IMAGE STACKING: MULTIPLE F-STOPs
Image stacking can be a powerful technique for improving the quality of a photograph. This tutorial discusses a technique which stacks images taken at different f-stops in order to overcome blurriness caused by diffraction and/or to improve corner sharpness — while also maintaining a vast depth of field. We refer to this as "f-stop stacking". It's perhaps most useful with landscape photography, and is also one of the easiest stacking techniques to implement.
EXTENDED DEPTH OF FIELD EXAMPLE
In a nutshell, here's how it works: several photos are taken at different f-stops, then a final composite is created using only the sharpest portions of each image. The result is a photo with an extended depth of field that looks natural, because sharpness still gradually decreases farther from the focusing distance (but just not by as much):
 Final Image with Extended Depth of Field
| Choose: | f/11 | f/22 | Extended DoF |
 100% Crop at Focusing Distance
 100% Crop of Foreground Stones
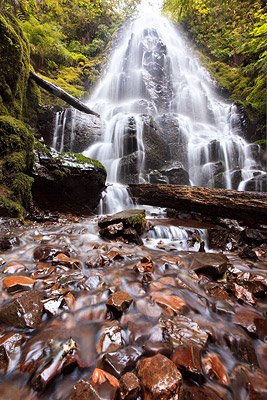
Fairy Falls - Columbia River Gorge State Park, Oregon, USA.
The foreground pebbles are just 6-12 inches away from the camera's lens.
Images taken with a 21.1MP Canon EOS 5D Mark II and a 17-40 mm f/4L lens at 17 mm.
In the above example, note how the center appears sharper at f/11, but that the closer foreground stones appear much sharper at f/22. At some distance, objects in both the higher and lower f-stop photos will appear equally sharp. This is where you want to place the seam/blend between each image. In this example, note how the seam falls roughly halfway between the bottom of the frame and the base of the waterfall:
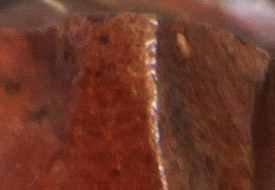
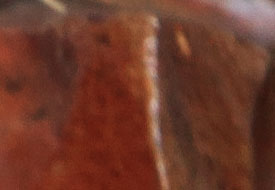
 Seam Between
f/11 and f/22 Photos
 Seam Applied as a
Layer Mask in Photoshop
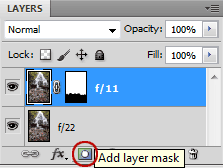
In order to blend each image in Photoshop, you will need to:
- Paste one photo on top of the other, as shown above (top right).
- Create a layer mask for the top photo (button circled in red above)
- Select the newly created mask (left click on this mask while holding the ALT key)
- Paint regions black that aren't as sharp as the bottom layer
The same general procedure works with just about any other image editing software that supports layers. Make the mask follow the natural contours of the image so that the seam isn't visible. In the example above, the seam follows the smooth water just above a row of pebbles.
The above waterfall example was fortunate enough to have a gradual upward blend from near to far objects; other photos might depict intertwined near/far objects, such as tree branches — resulting in a seam which is much more difficult to place. If your artistic intent allows for it, try to avoid complex subject layering if you plan on using the extended depth of field technique.
AUTOMATED SHARPNESS SELECTION
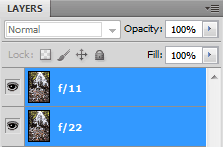
Alternatively, you can use specialized software to auto-select the sharpest regions of each photo (such as TuFuse, Helicon Focus, etc.). In Photoshop, this can be done by placing each exposure into a separate layer, then selecting "Edit > Auto-Blend Layers..." from the top menu, as shown below:
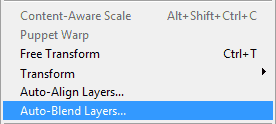
If your photos weren't taken on a stable tripod, you might first need to select the "Auto-Align Layers..." option above. Once the Auto-Blend process is complete, you'll be left with two layer masks as shown below.
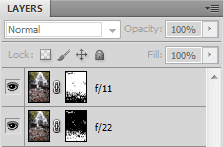
 Automated Photoshop Result
 Mask After Manual Editing
However, the running water in this example ends up tricking Photoshop. The longer exposure at f/22 makes the water appear smoother, so Photoshop mistakenly concludes that this water isn't as well focused as at f/11. Fortunately, both the f/11 and f/22 exposures are long enough that the water appears similar (otherwise the composite image might have water which appears uneven). Other subject matter can also be problematic, so it's always a good idea to check the result and to manually edit the mask if necessary. Simpler/motionless subject matter will often work flawlessly.
You can often achieve a more realistic looking depth of field by blending photos taken at more than two different f-stops. This is where Photoshop's Auto-Blend feature is most helpful. In the waterfall example, using an intermediate f-stop of f/16 improved results.
IMPROVE CORNER SHARPNESS
In the tutorial on camera lens quality, we saw that the center of an image always has the potential to produce the sharpest image (when properly focused), but that this sharpness decreases drastically toward the corners of a photo:
f/11: Image Center at 100% f/11: Extreme Corner at 100%
This corner softness is unrelated to depth of field; in fact, in the above example, the left and right photos depict objects which were about the same distance from the camera. Instead, this corner softness is entirely caused by how a lens is designed. For a given lens, the only way to reduce this edge softness is to use a higher f-stop. However, at really high f-stops, this increase in corner sharpness comes at the expense of sharpness at the image's center:
 f/22: Image Center at 100%
 f/22: Extreme Corner at 100%
Move your mouse over either image above to switch it back to f/11 for a direct comparison.
Note how the extreme corner appears much sharper at f/22 — even though f/22 makes the center of the image appear much softer. However, results will vary depending on the particular camera and lens that you happen to be using. Be sure to experiment with different settings first. The biggest difference will likely be seen with ultra-wide angle lenses and in cameras without "cropped" sensor sizes.
To combine the images, just use either the manual or automatic image stacking techniques (that were described in the previous two sections above).
EXTREME DOF WHILE ALSO FREEZING SUBJECT MOTION
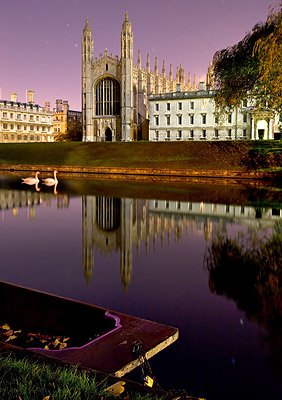
Example of frozen motion with Extended DoF
Kings College - Cambridge, England
Another use for the variable f-stop technique is with low-light photography, such as when one wants to freeze subject motion while also preserving sharpness throughout. In Cambridge, I always found it interesting when swans would glide along the river at night, but usually had difficulty capturing this in a photograph without using a flash.
In the example photo to the right, the camera was focused on the far side of the river. When the swans drifted by, the tripod-mounted camera first took an exposure at the lens's lowest f-stop (in this case f/2.8). This gave a relatively short exposure time of 0.5 seconds, which was fortunately brief enough to freeze the motion of the very slowly moving swans. Next, the camera's f-stop was increased to f/16 and a 16 second exposure was taken of the same scene. Each photo was then merged using layer masks, similar to the technique described above.
However, when using low f-stop values, the brightness near the edges of the frame can decrease ("vignetting"), which often creates problems with the extended depth of field technique. This can cause the combined multi-exposure photo to appear uneven and have abrupt changes in brightness. Just make sure to either (i) use a very gradual blend between each photo, or even better, (ii) to correct for vignetting prior to combining the exposures (using tools such as Adobe Photoshop's Camera RAW).
LIMITATIONS & ALTERNATIVES
F-stop stacking is a great tool, but it has one big disadvantage: it cannot extend depth of field any more than the highest f-stop setting of your lens. It's really just intended to prevent diffraction from softening the region of focus. Two excellent alternatives include:
- Extending Depth of Field by Using the "Focus Stacking" Technique.
This is more complicated because photos are never in alignment, but it has the potential to provide a virtually limitless depth of field. - Using Tilt Movements with a Tilt/Shift Lens to Reposition the Depth of Field.
This can capture moving subjects, but is limited to situations where the subject lies along a wedge-shaped region.