
 Helpful Posts:
 I have been very slack about my photography of late and even slacker about posting here but I do mean to make a mends
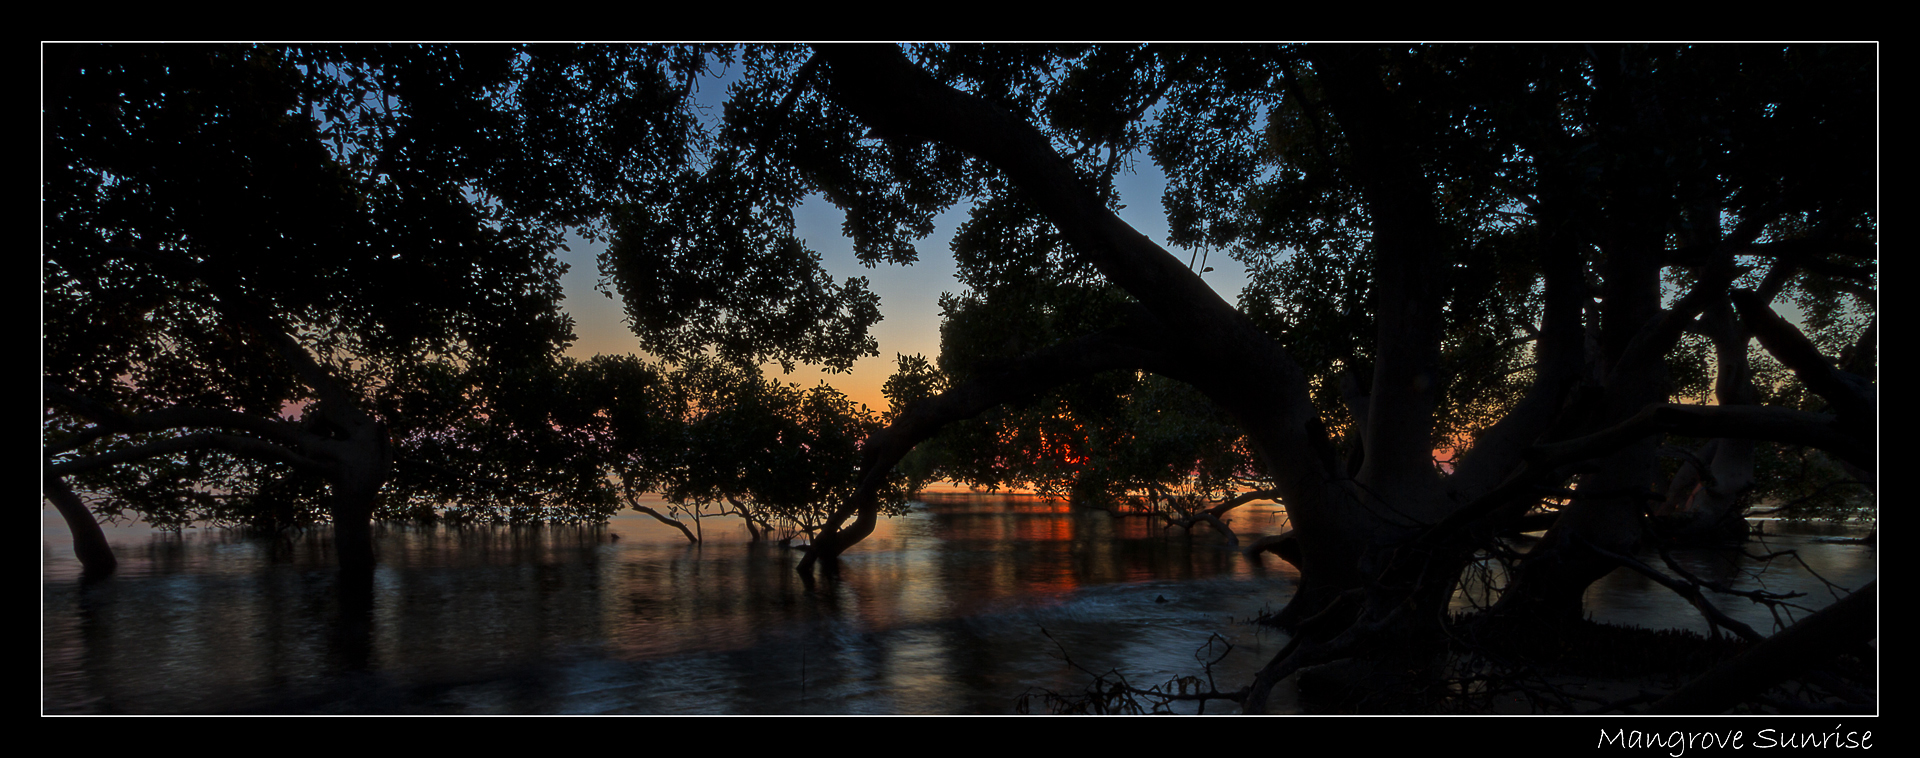
Anyway, I've just learnt about channel masking. Talk about a time saver! In this effort I tried to get rid of the over exposure above the horizon using this method as opposed to laboriously brushing out each segment between the leaves and branches.
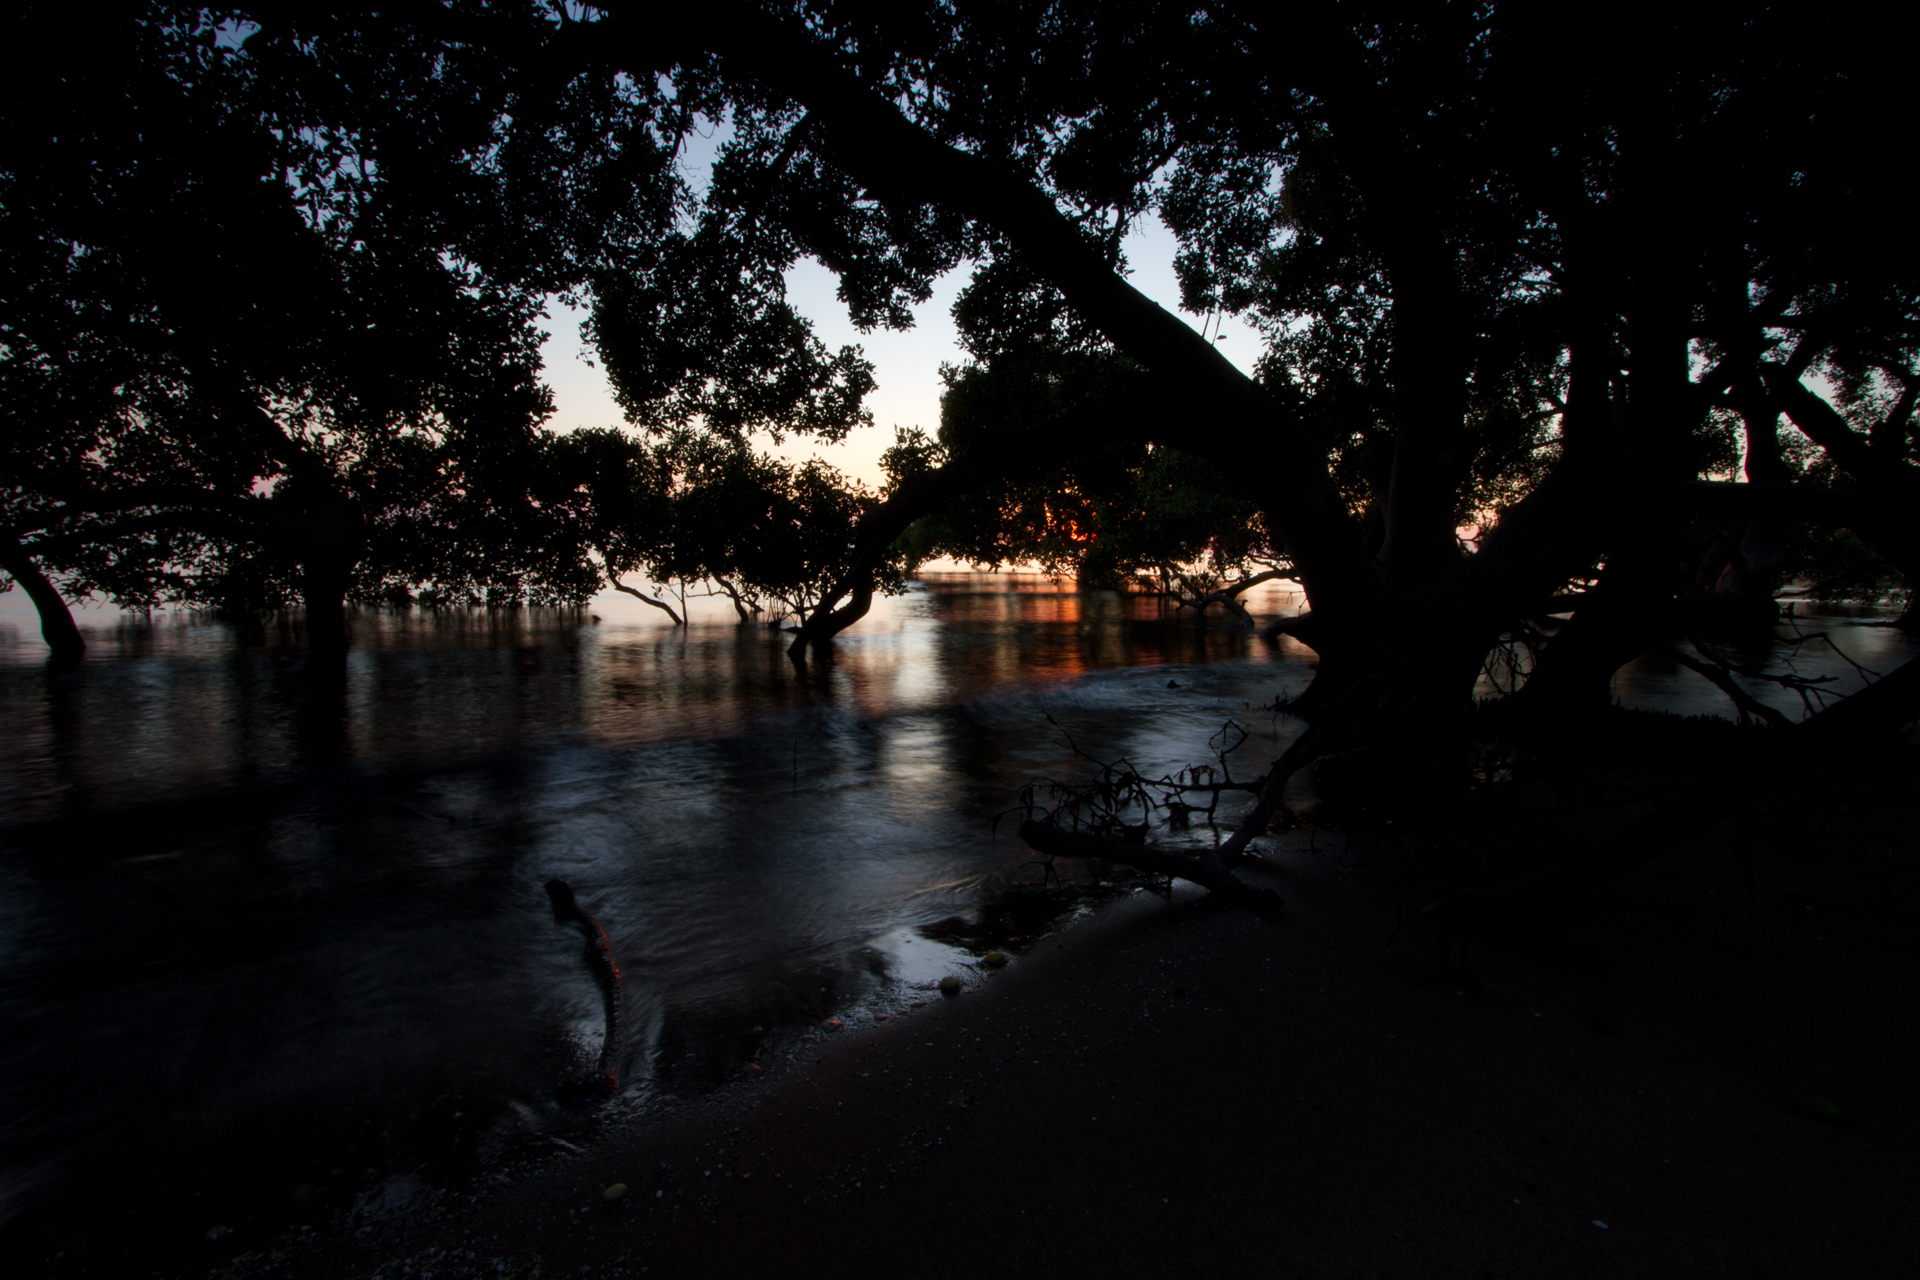
The second image is as shot with no editing. C&C welcome.
Results 1 to 6 of 6
Thread: Channel Masking for exposure
-
15th August 2012, 06:48 AM #1


- Join Date
- Dec 2010
- Location
- Brisbane, Australia
- Posts
- 500
- Real Name
- Mark
Channel Masking for exposure
Last edited by whited3; 18th August 2012 at 02:55 AM. Reason: Updated the finished image
-
16th August 2012, 11:42 PM #2

- Join Date
- Mar 2012
- Location
- Madrid
- Posts
- 155
- Real Name
- Patrick
Re: Channel Masking for exposure
Mark, I think you did a very good job with this technique. I'm still learning when it comes to PP and this looks like something I could use, especially since I still haven't dabbled much in HDR. Could you point me to a tutorial that you followed or give me a general idea of how you did this? I'm just getting into masks so I know the basics but not much beyond that.
Cheers,
Patrick
-
18th August 2012, 02:01 AM #3
- Join Date
- Dec 2010
- Location
- Brisbane, Australia
- Posts
- 500
- Real Name
- Mark
Re: Channel Masking for exposure
Patrick,
This method uses the RGB channels to select an area(s) by its luminosity (brightness), then uses this selection to apply lightening/darkening via a Levels adjustment layer where the blend mode is Screen (to lighten) or Multiply (to darken).
In the layers panel, Channel tab:
• Select the R, G or B channel that provides the highest contrast.
• Window/Histogram to show the Histogram.
• CTRL+Click the selected channel to select the area from 50% to white. See histogram.
o Shift+Ctrl+ALT click to move the 50% point higher, narrowing the selection towards white.
o Shift+Ctrl click to move toward darker selections.
o Use Select/Inverse to swap between selections (for lighten only).
In the layers panel, layers tab:
• Add a Levels adjustment layer
• Set blend mode to Screen to lighten (Multiply to darken).
Notes:
• The above 2 steps could be an action.
• ALT+Click on the mask to see it.
• Use a brush on the mask (with low opacity) to tidy up if required.
Hope this makes sense!
-
18th August 2012, 02:25 AM #4

- Join Date
- May 2011
- Location
- Brisbane Australia
- Posts
- 4,636
- Real Name
- Dave Ellis
Re: Channel Masking for exposure
Mark judging by the before and after shots, the technique seems to be quite effective. I must have a play with it. Thanks for sharing.
Dave
-
18th August 2012, 03:00 AM #5
- Join Date
- Dec 2010
- Location
- Brisbane, Australia
- Posts
- 500
- Real Name
- Mark
Re: Channel Masking for exposure
Thanks Dave. I've updated the finished pic after some resharpening.
-
18th August 2012, 06:13 PM #6
- Join Date
- Mar 2012
- Location
- Madrid
- Posts
- 155
- Real Name
- Patrick
Re: Channel Masking for exposure
Thanks Mark for explaining that, I'll give it a try.


 Reply With Quote