TILT SHIFT LENSES: PERSPECTIVE CONTROL
Tilt shift lenses enable photographers to transcend the normal restrictions of depth of field and perspective. Many of the optical tricks these lenses permit could not otherwise be reproduced digitally—making them a must for certain landscape, architectural and product photography. The first part of this tutorial addresses the shift feature, and focuses on its use for in digital SLR cameras for perspective control and panoramas. The second part focuses on using tilt shift lenses to control depth of field.
OVERVIEW: TILT SHIFT MOVEMENTS
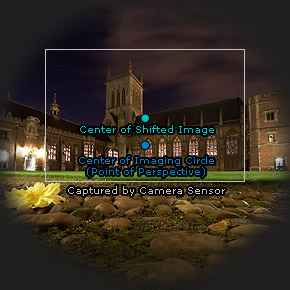
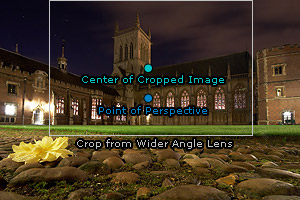
Shift movements enable the photographer to shift the location of the lens's imaging circle relative to the digital camera sensor. This means that the lens's center of perspective no longer corresponds the the image's center of perspective, and produces an effect similar to only using a crop from the side of a correspondingly wider angle lens.
Tilt movements enable the photographer to tilt the plane of sharpest focus so that it no longer lies perpendicular to the lens axis. This produces a wedge-shaped depth of field whose width increases farther from the camera. The tilt effect therefore does not necessarily increase depth of field—it just allows the photographer to customize its location to better suit their subject matter.
CONCEPT: LENS IMAGING CIRCLE
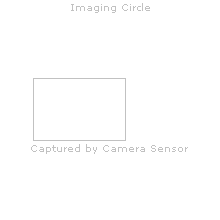
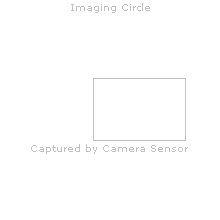
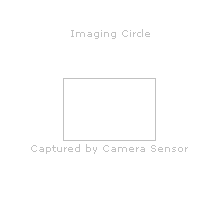
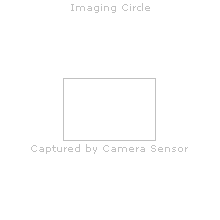
The image captured at your camera's digital sensor is in fact just a central rectangular crop of the circular image being captured by your lens (the "imaging circle"). With most lenses this circle is designed to extend just beyond what is needed by the sensor. Shift lenses, by contrast, actually project a much larger imaging circle than is ordinarily required—thereby allowing the photographer to "shift" this imaging circle to selectively capture a given rectangular portion.
 Ordinary Camera Lens
| Apply Shift: | Left | Right |
 Lens Capable of Shift Movements
Above comparison shown for 11 mm shift movements on a 35 mm SLR camera;
actual image circles would be larger relative to the sensor for cameras with a crop factor
(see tutorial on digital camera sensor sizes for more on this topic).
Shift movements have two primary uses: they enable photographers to change perspective or expand the angle of view (using multiple images). Techniques for each are discussed in subsequent sections. The above example would be more useful for creating a panorama since the medium telephoto camera lens created a flat perspective.
The shift ability comes with an additional advantage: even when unshifted, these lenses will typically have better image quality at the edges of the frame—similar to using full frame 35 mm lenses on cameras with a crop factor. This means less softness and vignetting, with potentially less pronounced distortion.
On the other hand, a lens capable of shift movements will need to be much larger and heavier than a comparable regular lens, assuming the same focal length and maximum aperture. Extreme shift movements will also expose regions of the imaging circle with lower image quality, but this may not be any worse than what is always visible with an ordinary camera lens. Furthermore, a 24 mm tilt shift lens is likely to be optically similar to an ordinary 16 mm lens due to a similar sized imaging circle. This means that this 24 mm tilt shift lens is therefore likely to be surpassed in optical quality by an ordinary 24 mm lens, since wider angle lenses generally have poorer optical quality.
SHIFT MOVEMENTS FOR PERSPECTIVE CONTROL
Shift movements are typically used for perspective control to straighten converging vertical lines in architectural photography. When the camera is aimed directly at the horizon (the vanishing point below), vertical lines which are parallel in person remain parallel in print:
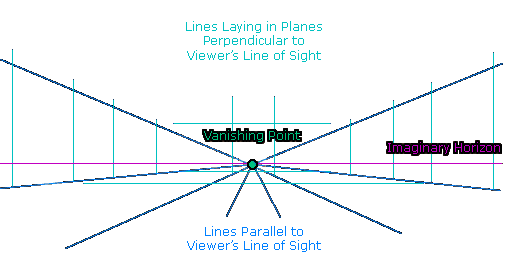
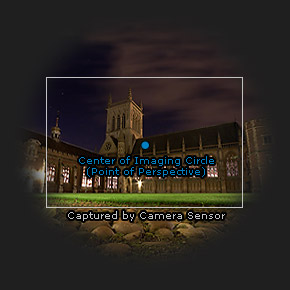
Converging verticals arise whenever the camera lens (ie, center of the imaging circle) is aimed away from the horizon. The trick with a shifted lens is that it can capture an image which lies primarily above or below the horizon—even though the center of the imaging circle still lies on or near the horizon. This effect changes the perspective.

| Ordinary Lens | Lens Shifted for Perspective Control |
The shifted lens gives the architecture much more of a sense of prominence and makes it appear more towering—as it does in person. This can be a very useful effect for situations where one cannot get sufficiently far from a building to give it this perspective (such as would be the case when photographing buildings from the side of a narrow street).
Note that in the above example the vanishing point of perspective was not placed directly on the horizon, and therefore vertical lines are not perfectly parallel (although much more so than with the ordinary lens). Often times a slight bit of convergence is desirable, since perfectly parallel vertical lines can sometimes look overdone and unrealistic.
A similar perspective effect could be achieved using an ordinary lens and digital techniques. One way would be to use a wider angle lens and then only make a print of a cropped portion of this, although this would sacrifice a substantial portion of the camera's megapixels.
A second way would be to stretch the image from the ordinary lens above using photoshop's perspective control (so that it is shaped like an upside down trapezoid).
The second method would retain more resolution, but would yield an image whose horizontal resolution progressively decreases toward the top. Either way, the shifted lens generally yields the best quality.
Technical Note: it is often asked whether digital perspective control achieves similar quality results as a shifted lens. Although the above digital techniques clearly sacrifice resolution, the question is whether this is necessarily any worse than the softening caused by using the edge of the imaging circle for an optically poor tilt shift lens. In my experience, using a shifted lens is visibly better when using Canon's 45 mm and 90 mm tilt shift lenses. Canon's 24 mm tilt shift lens is a closer call; if chromatic aberrations are properly removed I still find that the shifted lens is a little better.
SHIFT MOVEMENTS FOR SEAMLESS PANORAMAS
One can create digital panoramas by using a sequence of shifted photographs. This technique has the advantage of not moving the optical center of the camera lens, which means that one can avoid having to use a panoramic head to prevent parallax error with foreground subject matter. Another potential benefit is that the final composite photo will retain the rectilinear perspective of the original lens.

The Canon and Nikon lenses can shift up to 11 mm and 11.5 mm, respectively, which describes how far the lens can physically move relative to the camera sensor (in each direction). Several common shift scenarios have been included below to give a better feel for what 11 mm of shift actually means for photos. Since each lens can rotate on its axis, this shift could be applied in two directions:
 Full Frame 35 mm Sensor
Area Increase: 60%
Aspect Ratio: 2.42:1
 Sensor with 1.6X Crop Factor
Area Increase: 100%
Aspect Ratio: 3:1
 Full Frame 35 mm Sensor
Area Increase: 90%
Aspect Ratio: 1.28:1
 Sensor with 1.6X Crop Factor
Area Increase: 150%
Aspect Ratio: 1.66:1
note: all diagrams shown to scale for 11 mm shift; area increases rounded to nearest 5%
Note how cropped sensors have more to gain from shifting than full frame sensors. For panoramas, one can achieve dramatically wide aspect ratios of 2:1 and 3:1 for full frame and cropped sensors, respectively, with substantially more resolution. Many more combinations of camera orientation, shift direction and sensor size can be explored using the calculator in the next section.
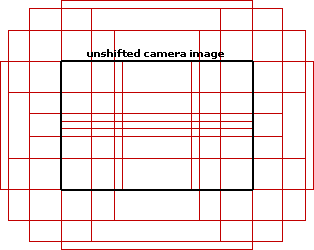
Shift can also be used in other directions than just up-down or left-right. The example below illustrates all combinations of shift in 30° increments for a 35 mm full frame sensor in landscape orientation:

Move your mouse over the image to see frame outlines for each shift combination.
Megapixels of above image increased by 3X compared to a single photo; if 1.6X CF this would be 5X.
Once captured, the stitching process is more straightforward since each photograph does not have to be corrected for perspective and lens distortion, and lens vignetting will not be uneven between images. Photoshop or another basic image editing program could therefore be used to layer the images and align manually. Make sure to use manual or fixed exposure since vignetting can cause the camera to expose the shifted photos more than the unshifted photo—even if the photos are exposed using a small aperture. This occurs because the camera's through the lens (TTL) metering is based on measurements with the lens wide open (smallest f-number), not the aperture used for exposure.
Alternatively, one could use photo stitching software on a series of shifted photographs to create a perspective control panorama. Such a panorama would require the lens to be shifted either up or down, and remain in that position for each camera angle comprising the panorama.
TILT SHIFT LENS CALCULATOR
The tilt shift calculator below computes the angle of view encompassed by shift movements in up-down or left-right directions, along with other relevant values. This is more intended to give a better sense for the numerics of shift movements than to necessarily be used in the field. This way, when your lens has markings for 5 and 10 mm of shift, you should be able to better visualize how this will impact the final image. The diagram within the calculator (on the right) adjusts dynamically to illustrate your values.
The output for "focal length if single photograph" is intended to give a feel for what focal length would be required, using an unshifted photo, in order to encompass the entire shifted angle of view. From this we can see that the imaging circle of a 45 mm tilt shift lens actually covers an angle of view comparable to an ordinary 28 mm wide angle lens.
AVAILABLE NIKON & CANON TILT SHIFT LENSES
Canon has four and Nikon has three mainstream tilt shift lens models available:
| Canon Tilt Shift Lenses | Nikon Tilt Shift Lenses |
|---|---|
| Canon 17 mm TS-E f/4L | |
| Canon 24 mm TS-E f/3.5L II | PC-E Nikkor 24 mm F3.5D ED |
| Canon 45 mm TS-E f/2.8 | PC-E Nikkor 45 mm F2.8D ED |
| Canon 90 mm TS-E f/2.8 | PC-E Nikkor 85 mm F2.8D ED |
Calculations and diagrams above have been designed to represent the range of tilt and shift movements relevant for these lenses on the 35 mm and cropped camera formats.
Note that this tutorial only discusses the shift feature of a tilt shift lens; for part 2 visit:
Tilt Shift Lenses: Using Tilt to Control Depth of Field
Alternatively, for an overview of ordinary camera lenses, please visit:
Understanding Camera Lenses: Focal Length & Aperture