MACRO CAMERA LENSES
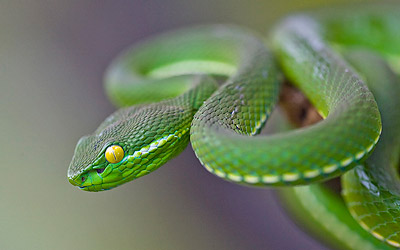
A macro lens literally opens up a whole new world of photographic subject matter. It can even cause one to think differently about everyday objects. However, despite these exciting possibilities, macro photography is also often a highly meticulous and technical endeavor. Since fine detail is often a key component, macro photos demand excellent image sharpness, which in turn requires careful photographic technique. Concepts such as magnification, sensor size, depth of field and diffraction all take on new importance. This advanced tutorial provides a technical overview of how these concepts interrelate.
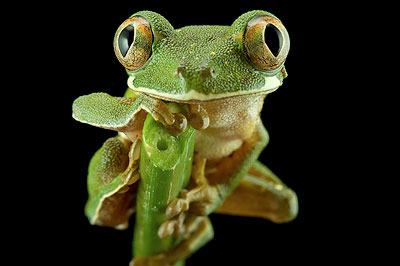
Photo courtesy of Piotr Naskrecki, author of "The Smaller Majority."
MAGNIFICATION
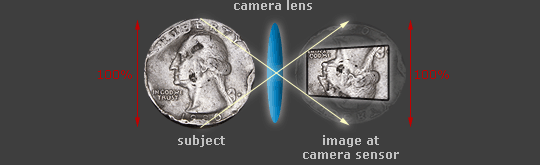
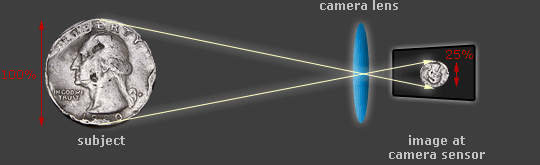
Magnification describes the size an object will appear on your camera's sensor, compared to its size in real-life. For example, if the image on your camera's sensor is 25% as large as the actual object, then the magnification is said to be 1:4 or 0.25X. In other words, the more magnification you have, the smaller an object can be and still fill the image frame.
 |
|
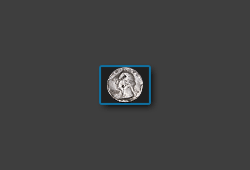
| Photograph at 0.25X Magnification (subject is farther) |
Photograph at 1.0X Magnification (subject is closer) |
Diagram only intended as a qualitative illustration; horizontal distances not shown to scale.
Magnification is controlled by just two lens properties: the focal length and the focusing distance. The closer one can focus, the more magnification a given lens will be able to achieve — which makes sense because closer objects appear to become larger. Similarly, a longer focal length (more zoom) achieves greater magnification, even if the minimum focusing distance remains the same.
Notes: the "focusing distance" is measured as the distance between camera sensor and subject, and the "lens focal length" is the actual lens focal length (without multipliers).
True macro lenses are able to capture an object on the camera's sensor at the same size as the actual object (termed a 1:1 or 1.0X macro). Strictly speaking, a lens is categorized as a "macro lens" only if it can achieve this 1:1 magnification. However, "macro" is often used loosely to also include close-up photography, which applies to magnifications of about 1:10 or greater. We'll use this loose definition of macro for the rest of the tutorial...
Note on cropped sensors: If you're using a full frame lens on a cropped sensor, the light captured at the sensor will appear more magnified than if it were captured using a full frame sensor — even though the focal length is the same. This is just because the smaller sensor crops out the exterior regions of the image — not because the lens has magnified the image. However, if you want to know the effective magnification above, then a focal length multiplier can be used — but only for full frame lenses on cropped sensors.
MAGNIFICATION & SENSOR SIZE
However, despite its usefulness, magnification says nothing about what photographers often care about most: what is the smallest object that can fill the frame? Unfortunately, this depends on the camera's sensor size — of which there's a wide diversity these days.
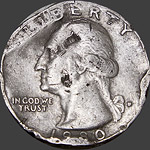 Full Size Object
(24 mm diameter)
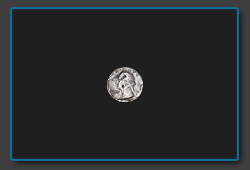
| Compact Camera at 0.25X |
| Full Frame SLR Camera at 0.25X |
All illustrations above are shown to scale.
Compact camera example uses a 1/1.7" sensor size (7.6 x 5.7 mm).
A US quarter was chosen because it has roughly the same heightas a full frame 35 mm sensor.
In the above example, even though the quarter is magnified to the same 0.25X size at each camera's sensor, the compact camera's smaller sensor is able to fill the frame with the image. Everything else being equal, a smaller sensor is therefore capable of photographing smaller subjects.
Note: the "smalled subject size" is measured along the photo's shortest dimension.
LENS EXTENSION & EFFECTIVE F-STOP
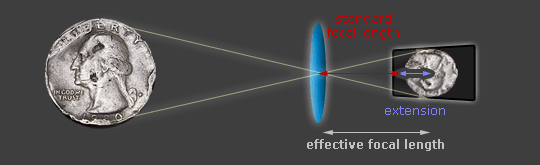
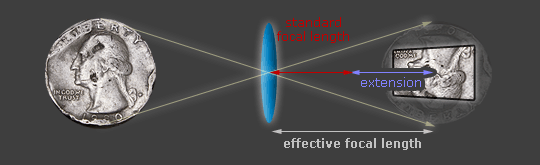
In order for a camera lens to focus progressively closer, the lens apparatus has to move farther from the camera's sensor (called "extension"). For low magnifications, the extension is tiny, so the lens is always at the expected distance of roughly one focal length away from the sensor. However, once one approaches 0.25-0.5X or greater magnifications, the lens becomes so far from the sensor that it actually behaves as if it had a longer focal length. At 1:1 magnification, the lens moves all the way out to twice the focal length from the camera's sensor:
 |
||
| Choose a Magnification: | 1:2 (0.5X) | 1:1 (1.0X) |
Note: Diagram assumes that the lens is symmetric (pupil magnification = 1).
The most important consequence is that the lens's effective f-stop increases*. This has all the usual characteristics, including an increase in the depth of field, a longer exposure time and a greater susceptibility to diffraction. In fact, the only reason "effective" is even used is because many cameras still show the uncompensated f-stop setting (as it would appear at low magnification). In all other respects though, the f-stop really has changed.
A rule of thumb is that at 1:1 the effective f-stop becomes about 2 stops greater than the value set using your camera. An aperture of f/2.8 therefore becomes more like f/5.6, and f/8 more like f/16, etc. However, this rarely requires additional action by the photographer, since the camera's metering system automatically compensates for the drop in light when it calculates the exposure settings:


Photo courtesy of Piotr Naskrecki.
For other magnifications, one can estimate the effective f-stop as follows:
For example, if you are shooting at 0.5X magnification, then the effective f-stop for a lens set to f/4 will be somewhere between f/5.6 and f/6.3. In practice, this will mean that you'll need a 2-3X longer exposure time, which might make the difference between being able to take a hand-held shot and needing to use a tripod.
The above formula works best for normal lenses (near 50 mm focal length). Using this formula for macro lenses with much longer focal lengths, such as 105 mm or 180 mm, will tend to slightly underestimate the the effective lens f-stop. For those interested in more accurate results, you will need to use the formula below along with knowing the pupil magnification of your lens:
Effective F-Stop = F-Stop x (1 + Magnification / Pupil Magnification)
Canon's 180 mm f/3.5L macro lens has a pupil magnification of 0.5 at 1:1, for example, resulting in a 50% larger f-stop than if one were to have used the simpler formula. However, using the pupil magnification formula probably isn't practical for most situations. The biggest problem is that pupil magnification changes depending on focusing distance, which introduces yet another formula. It's also rarely published by camera lens manufacturers.
Other consequences of the effective aperture include autofocus ability and viewfinder brightness. For example, most SLR cameras lose the ability to autofocus when the minimum f-stop becomes greater than f/5.6. As a result, lenses with minimum f-stop values of greater than f/2.8 will lose the ability to autofocus when at 1:1 magnification. In addition, the viewfinder may also become unreasonably dark when at high magnification. To see what this would look like, one can always set their camera to f/5.6 or f/8 and press the "depth of field preview" button.
Finally, it's important to note that Nikon cameras automatically correct for the effective f-stop. In other words, the f-stop that is reported in your Nikon camera's viewfinder/LCD will increase progressively as your focusing distance decreases — even if you never specifically changed the f-stop setting using standard methods.
MACRO DEPTH OF FIELD
The more one magnifies a subject, the shallower the depth of field becomes. With macro and close-up photography, this can become razor thin — often just millimeters:
Example of a close-up photograph with a very shallow depth of field.
Photo courtesy of Piotr Naskrecki.
Macro photos therefore usually require high f-stop settings to achieve adequate depth of field. Alternatively, one can make the most of what little depth of field they have by aligning their subject matter with the plane of sharpest focus. Regardless, it's often helpful to know how much depth of field one has available to work with:
Note: Depth of field defined based on what would appear sharp in an 8x10 in print viewed from a distance of one foot; based on standard circle of confusion for 35 mm cameras of 0.032 mm. For magnifications above 1X, output is in units of µm (aka microns or 1/1000 of a mm).
*If you are using a Nikon SLR camera, you will want to check this box; otherwise leave it unchecked.
Note that depth of field is independent of focal length; a 100 mm lens at 0.5X therefore has the same depth of field as a 65 mm lens at 0.5X, for example, as long as they are at the same f-stop. Also, unlike with low magnification photography, the depth of field remains symmetric about the focusing distance (front and rear depth of field are equal).
Contrary to first impressions, depth of field isn't inherently better with smaller camera sensors. While it's true that a smaller sensor will have a greater depth of field at the same f-stop, this isn't a fair comparison, because the larger sensor can get away with a higher f-stop before diffraction limits resolution. When both sensor sizes produce prints with the same diffraction-limited resolution, both sensor sizes have the same depth of field. The only inherent advantage is that the smaller sensor requires a shorter exposure time to achieve that depth of field.
MACRO DIFFRACTION LIMIT
Diffraction is an optical effect which limits the resolution of your photographs — regardless of how many megapixels your camera may have (see diffraction in photography tutorial). Images are more susceptible to diffraction as the f-stop increases; at high f-stop settings, diffraction becomes so pronounced that it begins to limit image resolution (the "diffraction limit"). After that, any subsequent f-stop increase only acts to further decrease resolution.
However, at high magnification the effective f-stop is actually what determines the diffraction limit — not necessarily the one set by your camera. This is accounted for below:
*Check this box if you are using a Nikon SLR camera; otherwise leave it unchecked.
The result is the f/stop as shown by your camera, not necessarily the effective f/stop.
Keep in mind that the onset of diffraction is gradual, so apertures slightly larger or smaller than the above diffraction limit will not all of a sudden look better or worse, respectively. Furthermore, the above is only a theoretical limit; actual results will also depend on the characteristics of your specific lens. Finally, the above calculator is for viewing the image at 100% on-screen; small or large print sizes may mean that the diffraction-limited f-stop is actually greater or less than the one suggested above, respectively.
With macro photography one is nearly always willing to trade some diffraction-induced softening for greater depth of field. Don't be afraid to push the f-stop beyond the diffraction limit. Diffraction is just something to be aware of when choosing your exposure settings, similar to how one would balance other trade-offs such as noise (ISO) vs shutter speed. With digital SLR cameras in general, aperture settings of f/11-f/16 provide a good trade-off between depth of field and sharpness, but f/22+ is sometimes necessary for extra (but softer) depth of field. Ultimately though, the best way to identify the optimal trade-off is to experiment — using your particular lens and subject matter.
WORKING DISTANCE & FOCAL LENGTH
The working distance of a macro lens describes the distance between the front of your lens and the subject. This is different from the closest focusing distance, which is instead (usually) measured from the camera's sensor to the subject.
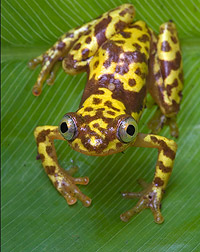
Photo courtesy of Piotr Naskrecki
The working distance is a useful indicator of how much your subject is likely to be disturbed. While a close working distance may be fine for photographs of flowers and other stationary objects, it can disturb insects and other small creatures (such as causing a bee to fly off of a flower). In addition, a subject in grass or other foliage may make closer working distances unrealistic or impractical. Close working distances also have the potential to block ambient light and create a shadow on your subject.
At a given magnification, the working distance generally increases with focal length. This is often the most important consideration when choosing between macro lenses of different focal lengths. For example, Canon's 100 mm f/2.8 macro lens has a working distance of just ~150 mm (6") at 1:1 magnification, whereas Canon's 180 mm f/3.5L macro lens has a more comfortable working distance of ~300 mm (12") at the same magnification. This can often can make the difference between being able to photograph a subject and scaring them away.
However, another consideration is that shorter focal lengths often provide a more three-dimensional and immersive photograph. This is especially true with macro lenses, because the greater effective focal length will tend to flatten perspective. Using the shortest focal length available will help offset this effect and provide a greater sense of depth.
CLOSE-UP IMAGE QUALITY
Higher subject magnification also magnifies imperfections from your camera lens. These include chromatic aberrations (magenta or blue halos along high contrast edges, particularly near the corners of the image), image distortion and blurring. All of these are often most apparent when using a non-macro lens at high magnification; by contrast, a true macro lens achieves optimal image quality near its minimum focusing distance.
The example below was taken at 0.3X magnification using a compact camera at its closest focusing distance. Since this is a standard non-macro lens, image quality clearly suffers:
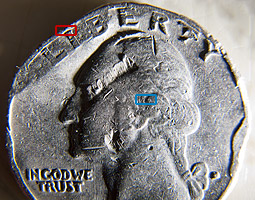 Close-up at 0.3X using a Compact Camera
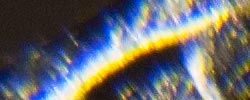
 Crops Shown at 100% Zoom
Above images are depicted even after aggressive capture sharpening has been applied.
Note how the chromatic aberrations and image softness is more pronounced farther from the center of the image (red crop). While the central crop (in blue) isn't as sharp as one would hope, chromatic aberration is far less apparent.
For additional macro photography options, also see the tutorial on:
Macro Extension Tubes & Close-up Lenses
For an introductory article, also see the Introduction to Macro Photography Technique