
 Helpful Posts:
 Okay,
So this weekend was our annual Christmas Party, along with being the host, I also decided to make an effort to grab some photos as well. So setting the mood, the room was illuminated mainly with White Christmas Lights on the tree and the boughs. A very nice atmosphere to enhance the Christmas Feeling, but for me as a rank newbie photographer it was a challenge.
Knowing that i needed as wide open of aperture as possible, I pulled out my trusty Nikkor 35mm f/1.8 Prime on my D5300 with my ISO set to 800. Firing away in Aperture Priority at f/2.0 most of my exposure times were in the 1/60 down to 1/30 second. When we turned on the overhead lights (people need to see what they are eating) I was able to get a bit faster of a SS.
As one might expect, many of the shots in the lower light came out blurry. The motion was too much for the slow shutter speed. (I am setting up my SmugMug account now and will share some photos in the future for those that might want to look closer into the photo details)
Reading and thinking some, i could have tried
1. Increasing ISO. This is a possibility to get the SS faster. Perhaps looking too deep into photos now but at 1:1 I see a good amount of noise in the facial features of many of my guest. (Am I Pixel Peeping too much here?)
2. Close the Aperture down a bit more - F/2.0 is not wide open where I shot most of my photos, but certainly more in the F/8 or F/11 range the lens can be more crisp. This of course is at the expense of SS
3. Flash - This is what I have been looking at the most. Perhaps this could have improved my results. I know that a flash will not directly correlate into increased SS, but would it have helped? I have spent the last couple of days searching and reading the post here on CiC as well as reading Bryan Peterson's book on Understanding Flash Photography to try and get a better understanding.
I did use a Tripod for shot that were stationary, but could not really use it for when I wanted to move around and grab some candid photos.
I am looking for any insight into how best to shot the candids in Low Light Environment. Perhaps it is just more time behind the lens, or is there some equipment/adjustments that I could have made to improve.
Thanks
Erik
Results 1 to 17 of 17
-
15th December 2014, 01:54 PM #1


- Join Date
- Aug 2014
- Location
- Germany
- Posts
- 460
- Real Name
- Erik
Photos in a dark room with movement
-
15th December 2014, 06:08 PM #2

- Join Date
- Dec 2014
- Location
- UK, West Wales
- Posts
- 314
- Real Name
- rob ashcroft
Re: Photos in a dark room with movement
Erik
If you are shooting shots in a social setting (as you were), and you just want images that remind you and others of that event, then I'm not sure that the image quality is all that important. It would be good if all images were clear of noise and with a high SS, but in a situation like that the image itself is more important.
I think you're quite right about flash being the better option. But that too can create difficulties in a low-light environment such as a restaurant - is that were you were? It's hard to comment without seeing one of the images. Can you post one of them to the thread, together with the EXIF data?
Edit your post. Click 'go advanced' and select attachments. Select a jpg from your computer.
-
15th December 2014, 06:35 PM #3Moderator


- Join Date
- Mar 2012
- Location
- Ottawa, Canada
- Posts
- 21,958
- Real Name
- Manfred Mueller
Re: Photos in a dark room with movement
 Originally Posted by TheBigE

Erik - it would certainly help to see the images, but off the top, ISO 800 on a modern camera like the D5300 being too noisy likely is the result of either underexposure or pixel peeping. If you are having trouble getting sharp shots at 1/30 or 1/60 with a 35mm lens, it could just be your technique; unless you have a fast moving subject, these shutter speeds would certainly be in the range of what I might try.
That being said, a bit faster shutter speed may be all you need. There is very little difference in terms of lens quality between f/1.8 and f/2.0, so I would certainly shoot wide open; again recognizing that your DoF will be fairly shallow. I would certainly give up that 1/3 of a stop and go to a slightly higher shutter speed. You will likely not notice the difference between f/1.8 and f/2.0; but an increase in shutter speed from 1/60 to 1/80 may make a lot of difference in image quality.
So to review the options you mention:
1. Increase ISO - that would be the first thing I would do. You should be able to get decent shots at ISO 1600 or even ISO 3200, especially if your exposure is correct. If there truly is a noise issue with your images, then running the images through some noise reduction software might be useful too.
2. Closing down the aperture will give you more depth of field, but you will have to compensate with either ISO being increased or as you have noted, reducing the shutter speed even more. This is something I would not do in low light situations; I would live with the shallow DoF and use it as a compositional tool.
3. Flash - that depends on the room and the event. Not everyone might want the pop of a flash going off. Here of course the question becomes the built-in flash on your camera or a hot-shoe mounted flash. I would stay away from the bulit in flash; there are simply too many downsides to it (low power, close to the optical axis of the lens, tiny light source, etc.).
If the room is decent (neutral walls and a ceiling that is not too high); I would definitely consider using a hot-shoe mounted flash; either as a bounce flash or using it with some form of light modifier. In this type of situation, I would try my Gary Fong Lightsphere; which gives a decent combination of direct and indirect light. If this does not work, I have a few more light modfiers I could try.
The issue is that you have to be comfortable with this technique, or the results can look quite awful.
A tripod is not necessarily the best tool; as you will use that to shoot at lower shutter speeds from a stationary location; not usually the best approach in the situation you were shooting under.
The best advice I can give you is that you practice with all three approaches and become familiar with them so that the next time you want to shoot in these lighting conditions, you have a better knowledge of both your equipment and the appropriate technique to use.
-
16th December 2014, 11:45 PM #4

- Join Date
- Jan 2009
- Location
- Sraylya
- Posts
- 4,936
- Real Name
- William (call me Bill)
Re: Photos in a dark room with movement
No. The preparation procedure as you described, is flawed. Originally Posted by TheBigE
To shoot Candid Portraiture in Low Level Available Light, you do NOT “need” the Aperture as wide open as possible.
What you NEED is a suitable SHUTTER SPEED. Then you compromise the ISO to allow what is an acceptable noise level and the Aperture to allow an acceptabe DoF (Depth of Field).
So – in other words, whilst there is a link between Aperture, ISO and Shutter Speed, the procedure must be to address SHUTTER SPEED first.
> For most social functions, making Half to Full Length Candid Shots of adults – then using a Shutter Speed of around 1/125th second is reasonably safe.
> Shutter speeds from 1/60th second to 1/125th second are quite doable with good TIMING of the shutter release.
> If the Photographer has the ability to catch the Subject’s attention, then around 1/30th second are possible.
From those as starting points, then one selects the Aperture and ISO (I am usually firstly cognisant of DoF and I tend prioritize Aperture next).
For example – you are using an APS-C camera – so for an HALF SHOT of one person (Vertical Orientation) or an HALF SHOT of TWO PEOPLE (Horizontal Orientation) you are going to have a DoF of about or less than 10 inches using F/2 . . . that’s really on the border of being dangerous and I would like to be at about F/4 which will give about 18 inches DoF for the HALF SHOTS. But on the other hand using F/2 for a FULL LENGTH SHOTS you would be quite safe.
Yes a 35/1.8 on APS-C is a good choice of lens for this shooting sceanrio - but my point is, in this shooting situation, the PROCEEDURE is that one must address the Shutter Speed that is required, before the thinking about the Aperture of the Lens that is used.
***
Yes. Originally Posted by TheBigE
If you want to shoot Available Light then: Increase the ISO. You should be able to easily go to ISO3200, with your camera.
I have answered this question so many times that I will bet one Mars Bar that your first error is that you are UNDEREXPOSED for the SKIN TONES. The Appearance of NOISE is exacerbated by underexposure: now this is an interesting shooting scenario as you will want to keep the mood of the low level ambient light – one method is to have few or no direct lights in the frame: and if you do have one or two, then it may need to be blown out.
Good Post Production Noise Reduction techniques need to be employed.
***
Around F/4 would be fine, I am quite confident. Originally Posted by TheBigE
***
Yes. Good idea. Originally Posted by TheBigE
Flash does not need to address the SHUTTER SPEED. It is the speed of the FLASH’s pulse which freezes the Subject Motion.
You might wish to research “dragging the shutter” which is a technique where a relatively slow SHUTTER SPEED is chosen to expose the (background) AMBIENT LIGHT and the flash illumination is used to expose the (foreground) SUBJECT.
Bounced or diffused Flash Techniques will be appropriate for this shooting scenario. I would generally use OFF CAMERA FLASH (Hand Held via Off Camera Cord) and bounce it off my bounce Mitt (i.e. NOT diffuse it) – there are many methods – none is “correct” none is “incorrect”. I tend to bounce rather than diffuse, because Flash Diffusion usually robs me of too much Flash Power.
***
Forget using a tripod for this shooting scenario. A monopod might be useful but only sometimes. Originally Posted by TheBigE
***
There are two options: Flash or Available Light. Then the techniques are different. Above is a precise of both. Originally Posted by TheBigE
***
A final comment on the Available Light option:
Prima facie, you were shooting at: F/2 @ 1/60th ~1/30th @ ISO800. I expect (as per above comment) that you were underexposed on skin tones – let’s say 1 stop.
You need to be at around 1/125ths. You need to be around F/4 – so probably a better plan going in would have been exposures somewhere in the area of: F/3.5 @ 1/100ths @ ISO3200~ISO4000.
Now that’s a comment without seeing any sample images – supplying sample images to illustrate a technical question is most helpful to soliciting quite specific answers, so a link to the images when you set up the account would be valuable.
***
Here are some samples of shooting Low Level Available Light at indoor functions, with notes that you might find helpful:

Sample 1: AVAILABLE LIGHT Picture Story Montage made with an EOS 5D and EF 35F/1.4L USM
Note: The two Low Light BACK LIT Dance Floor Images - the Spot Lights are blown out to facilitate a correct skin-tone exposure.
*

Sample 2 : Low Level AVAILABLE LIGHT Picture Story Montage made with an EOS 5D and EF 50/1.4
Note: Images shot at ISO 1600~3200. You NEED to bump the ISO – AND – make correct exposure for Skin Tones.
*

Sample 3 : Low Level AVAILABLE LIGHT made with an EOS 5D and EF 50/1.4
Note: Shooting INTO some lights can provide another perspective / mood to the record of the occasion.
*

Sample 4 : Low Level AVAILABLE LIGHT made with an EOS 5D and EF 50/1.4
Note that a very slow Shutter Speed can be used, but the technique of attracting the attention of the Subjects is useful.
*

Sample 5: Dragging the Shutter at Dusk to avoid the “Black Hole” behind the Subjects.
The Shutter Speed chosen to expose the Ambient Background, the Flash exposes the Subjects
*

Bounce Mitt that I often use for Indoor Flash / Off Camera / Dragging the Shutter.
WW
-
17th December 2014, 05:26 AM #5
- Join Date
- Dec 2014
- Location
- UK, West Wales
- Posts
- 314
- Real Name
- rob ashcroft
Re: Photos in a dark room with movement
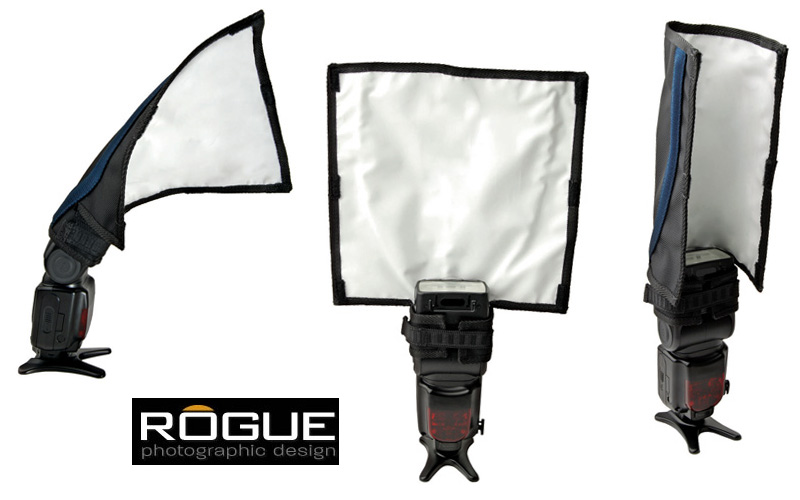
Haven't seen one like that before. I use a Rogue Flashbender which is similar. I find it excellent and makes a huge difference to exposure light quality. http://www.amazon.co.uk/Rogue-FlashB.../dp/B003UOIMAS Originally Posted by William W
-
17th December 2014, 07:47 AM #6
- Join Date
- Jan 2009
- Location
- Sraylya
- Posts
- 4,936
- Real Name
- William (call me Bill)
Re: Photos in a dark room with movement
Probably wont see many like it. It was a gift from a most expert Wedding and Portrait Photographer. It is hand-made and can be used inverted (using the back surface). Originally Posted by ashcroft
It is excellent because the Bounce is identifiable and consistent, both are necessary for Off-camera Bounce Hand Held, that I generally do.
Nadine Ohara tailor made mostly all of her Lighting Gear, each to suit specific Lighting Scenarios.
WW
-
17th December 2014, 12:26 PM #7
- Join Date
- Aug 2014
- Location
- Germany
- Posts
- 460
- Real Name
- Erik
Re: Photos in a dark room with movement
Rob, Originally Posted by ashcroft
Thanks for the reply an input, as a note I was in my home and lights were going on and off throughout the night.
I will be posting a link to my photos below, as well as a few more comments after a day of rethinking the situation.
Erik
-
17th December 2014, 12:35 PM #8
- Join Date
- Aug 2014
- Location
- Germany
- Posts
- 460
- Real Name
- Erik
Re: Photos in a dark room with movement
Manfred, Originally Posted by GrumpyDiver
Thanks for the input and taking time to get me feedback, I really appreciate it. I will be posting a link to the photos at the end of this thread for people to take a look at and give some feedback. Since they are some friends, I wanted to use a link that was ¨private¨ on SmugMug and have a bit of control over the photos on the web. That is primarly why I did not post directly on CiC and wanted to get SmugMug up and running.
After taking a break for a day and going back to the photos, I looked a bit more in detail and in fact a majority of the SS were below 1/30s. I think this is my main problem, everything was shot at ISO 800 so certainly I have room to raise that more for the situation. I am working on my technique (hand position, bracing, etc) to minimise any shutter from slower SS, but it is a bit of muscle memory. I am sure that will only improve and help in the future.
Given the room was largely white on the walls at about 10 feet high, I think this would have been a good place for a Shoe Mounted Flash and bouncing the light off the celling. I am looking at my next purchase to be Nikon SB700 shoe mounted flash, but I am still a bit concerned about getting equipment overload and having to learn more and perhaps not comfortable enough with my current equipment (as my works indicates). However, a Flash is not a full time use and would only be needed in a few situation until I become more comfortable.
Thanks again, and I think my major issue here was SS and reluctance to move up to ISO 1600 or 3200.
-
17th December 2014, 12:55 PM #9
- Join Date
- Aug 2014
- Location
- Germany
- Posts
- 460
- Real Name
- Erik
Re: Photos in a dark room with movement
Bill,
Thank you very much for taking the time to answer my questions and provide some very valuable feedback. It is greatly appreciated.
It is very clear after looking back, that I should have been focused more explicitly (vice implicitly) on SS. I think therein lies why my photos did not come out as good as I would have hoped, on the plus side, I have already learned a great deal. It really is a case of freezing the action or the motion in the room, which naturally drives one to SS. I was trying to use the 1/focal length rule in my mind when shooting, but that assume stationary objects and not children or people talking, opening packages etc. One of the key lessons for me is that I should have been trying to dial in a SS of around 1/125s. This maybe a bit high, but given that I was enjoying the party myself, that little extra ¨enjoying the wine ¨margin would be helpful Originally Posted by William W

Perhaps, in fact I thought my photos were a touch overexposed, but again I am still learning. I am really trying to get comfortable with the basics of PP using Lightroom 5. I mainly do much of my work in the Basic Panel in Develop. Perhaps it is time to venture into the other panels. I just recently completed a LR 5 course and have a much better understanding of what can be done in PP. Just one more thing to learn. Originally Posted by William W
I would agree and think this is my next major topic to learn about in Photography. As I said, I have been reading books and reviewing articles on the web about this topic. I am familiar with Dragging the Shutter, at least in concept, but will require a great deal of practice and patience. I do believe that a Shoe Mounted Flash in this case would have been beneficial, and that seems to be the consensus opinion. However, equipment alone will not make the difference, one needs to learn how to employ it. Originally Posted by William W
Thanks again, per my above post I have looked at some more of my photos from the night (after a day break) and realised my SS were even slower that 1/30. This is fundamentally the issue and my learning point from this session. I will include a link below on this thread to my SmugMug photos. Since they are friend and family, I wanted to keep some privacy for them and not post openly. The links should connect you to the photos and I will leave it open for about a week. Originally Posted by William W
Yes, thank you for these images and examples. They are very helpful and give me some excellent guidance on how to proceed in the future. You help is greatly appreciated. Originally Posted by William W
Erik
-
17th December 2014, 01:01 PM #10
- Join Date
- Aug 2014
- Location
- Germany
- Posts
- 460
- Real Name
- Erik
Re: Photos in a dark room with movement
As expected, I received great feedback on this topic. Thanks to everyone. I think my lesson here really is to crank up the ISO and get the SS to a level that works for the environment (action, stationary, etc), all while remembering to keep DoF in mind and make sure that you keep you subjects in the DoF.
Adding a Flash and using External Light would be helpful and could have improved the situation, but not necessarily required, as making the most of Ambient Lighting could have been possible.
Here is a link to some of the best photos I took that night - as I said, given that it was a party with family and friends I did not want to openly share on the Internet, so I have set the link to Unlisted. I will leave it open for a week and then close it down again. Thanks for understanding.Last edited by TheBigE; 17th December 2014 at 01:36 PM.
-
18th December 2014, 12:40 AM #11
- Join Date
- Jan 2009
- Location
- Sraylya
- Posts
- 4,936
- Real Name
- William (call me Bill)
Re: Photos in a dark room with movement
Thanks for posting the link to those images.
Supplementary comments in respect to shooting Candid Portraiture using Low Level Available Light:
1. Interrogating the EXIF on many (but not all) of the images it is noted that you were using:
> Aperture Priority Camera Mode
> Pattern Metering (Nikon)
> 0 Exposure Compensation
***
2. I think that my Mars Bar is safe.
Of the sample images, there appear three which are approaching close to the correct exposure for skin tones. Those images are:
> man and boy (boy wearing stars and stripes top)
> man and woman (tight bust shot)
> boy holding toys r us box
Of these three, the tight shot of the man and woman appears to be the best of all for correct exposure for skin tones I think that all the other images are in fact underexposed for skin tones.
For absolute clarity: when I write: underexposed for skin tones I am specifically referring to the EXPOSURE that is made in camera, so as to render, after Digital Post Production, (or with film, development and printing), the SKIN TONES in the best possible manner.
Making the correct exposure for skin tones when shooting in Low Level Available Light sometimes means that there will be HIGHLIGHTS that appear in the scene which will BLOW OUT. This is nearly always the case if there is a LIGHT SOURCE in the shot.
***
3. Your choice of using Aperture Priority:
Is neither correct, nor incorrect, but if chosen then one must always be watching (monitoring) the Tv (Shutter Speed) in the viewfinder display.
For my shooting protocols, my using Av Priority (Aperture Priority Camera Mode) usually means that I will be wasting both time and efficiency (and likely I will make an error), if I have to be monitoring the Tv in the Viewfinder for every shot before I release the shutter. I would generally use Manual Mode for these types of shooting scenarios the main reason is as per the above: more efficient and absolute knowledge of the Shutter Speed before releasing the shutter, because I would need to manually set the Shutter Speed and not allowing the Cameras TTL Meter to dictate it, and as result me miss the fact that the Shutter Speed had been changed automatically by the camera.
***
4. Your Choice of using Pattern Metering:
Is neither correct nor incorrect.
Points worth noting are, however -
> Most of the scenes (including all of the wide shots) have a large Dynamic Range and the Faces are mostly in shadow because of the room lighting.
> Many of the shots have a white or light coloured wall as the main canvas.
> (in simple terms) the TTL Meter will meter everything as if all are Standard Photographic Grey.
> Whilst the exact functionality, parameters and formula for Nikons PATTERN Metering is secret, from my experience this METERING MODE is an AVERAGING FUNCTION and will tend toward NOT allowing HIGHLIGHTS to be blown sometimes at the expense of SHADOW DETAIL.
These are the main theory reasons why I now further conclude that you are underexposed for skin tones and why you see NOISE in the skin tones (and background shadow detail).
Notwithstanding that theory, interrogation of the images confirms.
The image of the little girl in the white dress, I believe is an interesting and useful example:
> the TTL Meter would have metered mostly a large white area (the dress) and rendered the dress as if it were Standard Photographic Grey;
> because the window (which is blown out) is relatively small area and at an extreme of the metering frame, I believe that area was given less than usually value in the meters computation:
> the result is an underexposure of about two stops, (perhaps three or more stops if the image has already been bumped in Post Production), for the correct skin tone of the child.
***
5. Understand how important it is to know the Metering Modes
One of the most significant of Students learning black holes that I have noted over the past ten years (the digital era) is not learning how the TTL Meter and the different Metering Modes work and how valuable is that knowledge, so it can be practically applied to various shooting scenarios.
***
6. Your (non) use of Exposure Compensation:
Ostensibly - when we shooting inside a venue, at night time, we will have faces in shadow from ceiling lights and/or hard direct light from wall lights or table lamps; the walls are light in colour (lighter than Standard Photographic Grey) so this shooting scenario is (usually) always a condition where the E/C would be used to ensure correct exposure for skin tones when one chooses an AUTOMATIC CAMERA MODE (i.e. the three most common being: Shutter Priority Mode, Aperture Priority Mode; A/E Program Mode).
***
7. Why is he harping on about correct exposure for skin tones?
Because for Candid Portraiture, (usually always) the MOST important element is the FACIAL EXPRESSION, so usually the FACES should take precedence for any Exposure Computation for the shot. (The same applies if one is using Flash - but getting the Flash Exposure correct is a different procedure).
***
8. Well done.
Kudos and Bravo here
Yes.. . . require a great deal of practice and patience. . . equipment alone will not make the difference, one needs to learn how to employ it.
Key word: Practice.
Patience for sure, but before patience: review your errors and ask WHY?
I am still amazed at how many Photographers do NOT perform Practice especially on the nuts and bolts . . .
WW
-
18th December 2014, 04:34 AM #12
- Join Date
- Apr 2012
- Location
- Dunedin New Zealand
- Posts
- 2,697
- Real Name
- J stands for John
Re: Photos in a dark room with movement
There is another techniqiue which was common when cameras only went to 1000 ISO.
It is based on the point that irrespective of anything else the important thing is to have sharp photos. Unsharp images cannot be corrected while poor colour can usually be fixed, along with noise, in editing.
SO the technique is to pick the suitable shutter speed and then in editing raise the dark photos in editing using NOT the brightness/contrast tool but either Levels or Curves which permit you to raise dark tones without blowing highlights that the simple B/C tool will normally do.
As a newbie you probably are not that familiar with an editing programme, maybe you do not even have one, so rather than investing in equipment which will rarely be used it is better to get a good editing programme such as [at least] Elements or better Paint Shop Pro [ which will not break the bank ] or Photoshop Cloud which unfortunately commits you to a regular payment whether you use it or not. If you want to try flash I suggest that you let the camera do it for you ... I have numerous flash units which rarely get used becuase I find that when I need extra light the built-in flash is quite adequate and should not be dismissed as so often one reads in photo circles.
I have not used this technique for some time now because with the advances in cameras I know that I can safely work at 6400 ISO for family shots which do not require anything bigger than a monitor screen size. But a one or two stop under exposure is perfectly valid with a good camera .... bridge, MFT, or APS-C. The only drawback is that you need to have confidence in what you are shooting as it is unlikely you will be able to view the results in-camera and have to wait until they are opened in your editor. Not a problem for me as I rarely 'chimp'
Last edited by jcuknz; 18th December 2014 at 04:40 AM.
-
18th December 2014, 05:17 AM #13
- Join Date
- Jan 2009
- Location
- Sraylya
- Posts
- 4,936
- Real Name
- William (call me Bill)
Re: Photos in a dark room with movement
I concur, John.
And knowing and applying that technique is not limited to only Bridge Cameras / Small Sensor Cameras. It is a very useful technique when the ISO of any camera is pushed to the limit: this image below was made in 2010 with my original EOS 5D, simply because that camera had the most useful lens on it at the time I saw the shot. Pushed to ISO 3200(aka “H”) to make the shot, the original file is about three stops under exposed for skin tones

"Sparkler" - Sydney 2010
(please view me large)
There is more technical commentary about the shot and the Post Processing, here.
WW
All images posted by this author are © AJ Group Pty Ltd (AUST) (WMW) 1996~2014
-
18th December 2014, 12:07 PM #14
- Join Date
- Aug 2014
- Location
- Germany
- Posts
- 460
- Real Name
- Erik
Re: Photos in a dark room with movement
Bill - Thank you for the very detailed, and factual based feedback. It helps me answer the ¨Why¨ my photos came out the way they did...
This is one thing I have been thinking about more and more, and need to keep the dial in M. In these challenging conditions (for me at least) this gives me greater control and allows me to make the decisions. Albeit at first perhaps the wrong decision, but eventually it will all come together over time. My thought being in Av mode was that I could quickly grab that candid photo, letting the camera do most of the work. I am proficient (not fast) at making adjustment in Manual Mode looking through Viewfinder, but I am always worried that it takes to much time and I will miss the moment. Again, practice will help here. Originally Posted by William W
I will admit this is a black hole. I have looked the various Metering Modes on my camera, and can understand them in theory but practice is an entirely new area. I have basically put learning about these on hold until I have a better grasp overall of the function on my camera. Perhaps it is time to invest a bit more time and experimentation in this area. Originally Posted by William W
Yes, I still struggle when to under and overexpose. I think I just need more time behind the glass and PP to really understand. Given this latest exercise I am sure it could have been helpful. Originally Posted by William W
Thanks again for the great feedback, it really helps me answer the Why...Why did my photos come out as such, why are they blurry, or the skin tones blown out. Originally Posted by William W
For me this lesson has taught me the following
1. Continue to watch SS - develop some good rules of Thumb given the scene and my capabilities for Shutter Speed.
2. In challenging lighting environments, keep the camera in Manual for full control.
3. Maximising Skin Tones in Candid Photos - Watch out for Underexposing these tones, use EC or Manual Mode to account for skin tones and correct exposure.
4. Buy a stash of Mars Bars...probably going to loose a few more.
There is more here and will need to keep working to develop my skills. Nothing happens overnight, but it goes faster by having great feedback and support from the CiC community. Thanks!!
-
18th December 2014, 12:13 PM #15
- Join Date
- Aug 2014
- Location
- Germany
- Posts
- 460
- Real Name
- Erik
Re: Photos in a dark room with movement
John - Thanks for the feedback. I am using LR5 and Photoshop as my editing program via the Creative Cloud. I mainly do most of my PP in LR5, but admitadely nothing more than in just the basic panel. I know there is more power there as well as in Photoshop (which I have used before). Originally Posted by jcuknz
I know my PP skills can improve, and this, like everything else will take time. I am hoping and trying to get as close as possible in the camera and minimal adjustment externally.
Regarding the installed flash, it is good to hear an alternative opinion as many sites say it is not worth using the installed flash - power, directions, etc all being part of the reason. I would have to think that if the manufacturers realised that they are useless they would remove them all together. I will try and use it as well. I have ordered a SB700 for my Nikon to begin playing around a bit with both flashes. I am hoping for some good results.
Thanks again for your help.
Regards
Erik
-
18th December 2014, 05:55 PM #16
- Join Date
- Jan 2009
- Location
- Sraylya
- Posts
- 4,936
- Real Name
- William (call me Bill)
Re: Photos in a dark room with movement
That's funny. Originally Posted by TheBigE
That made me laugh
You have a great Christmas - cheers for now.
WW
-
19th December 2014, 09:55 AM #17
- Join Date
- Aug 2014
- Location
- Germany
- Posts
- 460
- Real Name
- Erik
Re: Photos in a dark room with movement
And a Merry Christmas to you and everyone else!!! Originally Posted by William W

 Reply With Quote