
Hi Gimpophiles (and Photoshopians as well) - There have been several posts of late on sharpening, one of the most important of techniques open to digital photographers. McQ, Colin Southern and others have produced excellent tutorials and commentaries on various aspects of sharpening and attention has been drawn to the book by Bruce Fraser and Jeff Schewe, "Image Sharpening with Adobe Photoshop...". There is now a second edition available in the UK, ISBN 978-0-321-63755-0, available via Amazon and other online retailers.
One aspect of sharpening to which Fraser and Schewe draw attention is that of blending out highlights and shadows before sharpening, so reducing any increase in artefacts arising from noise. They describe how to do this using the "Blend If" option associated with Photoshop's Layer Style. While Paint Shop Pro has a similar tool, the Gimp, regrettably does not. However, there is a workaround that captures the essence of their method and I describe this below. I am going to assume that Gimp users are familiar with the major aspects of the Gimp.
Take the layer that you wish to sharpen. Duplicate it and then switch off its visibility. This makes things easier to see later. Switch to the duplicate layer and add a layer mask, using the greyscale option. Make sure at this point that the mask is normal and not inverted. Work now on the mask. Open the Levels dialogue and shift the left hand slider on the input scale to the right hand side. This causes the transparency of the mid tones and dark areas to increase, leaving the highlights still visible. When satisfied that you have all the relevant highlights, invert the mask and then apply it. The highlights have been masked out, leaving the rest of the image intact.
Now, repeat the above procedure on the same layer. Create a new layer mask, but this time invert it. Open the Levels box and slide the left hand pointer to the right. Now the mid tones and any remaining light tones disappear. When only the dark tones remain, invert the mask and apply it. Now you will have a layer that has had its highlights and shadows removed. Sharpen at will on the remaining mid tones and blend via Normal with the lower layer, having switched it back on.
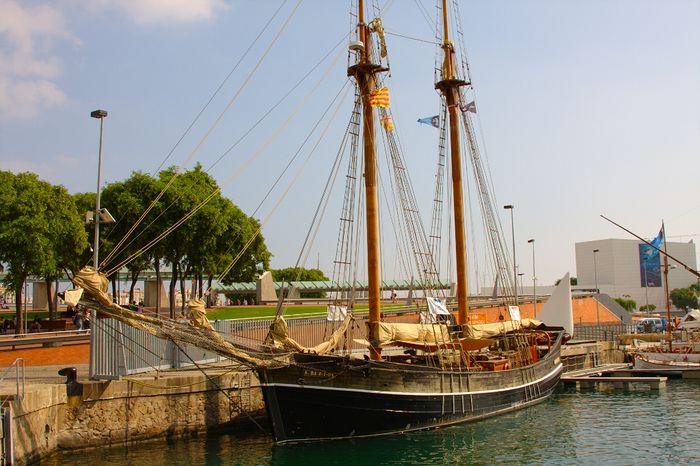
Here is an example. The first image is from a RAW file directly input into the Gimp. There has been no sharpening.
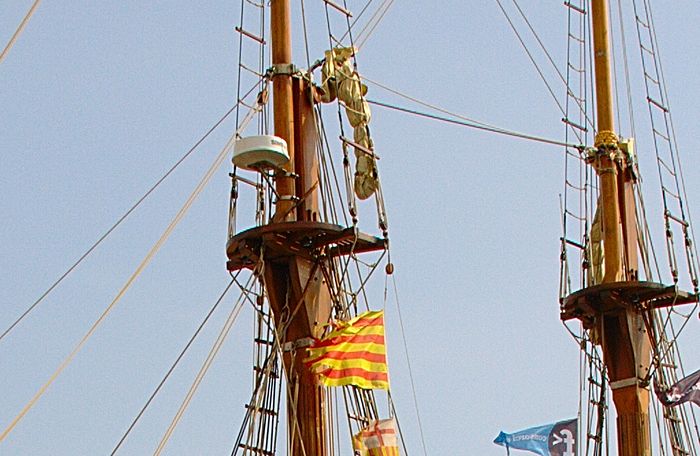
The second image is a 100% shot of part of the rigging. Remember that to check on sharpening you should be looking at 100% displays to avoid display induced artefacts.
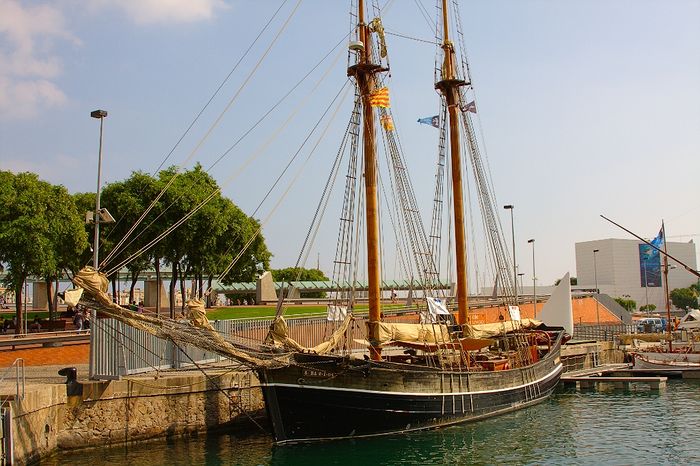
The third image is of the full shot sharpened conventionally, using the wavelet sharpening function in the Gimp (Amount 1.0, Radius 0.5). Note that there is now noise in the sky and halos on parts of the rigging. You may have to click on the image to see this in full size.
The fourth image shows the same 100%, but with mid tone sharpening, carried out in the manner described above. Note that exactly the same sharpening parameters were used. Now there is very little noise introduced and effectively no halos.
The final image shows the full frame sharpened in this manner.
Overall, mid tone sharpening is to be recommended and although the Fraser and Schewe technique using Blend If in Photoshop is not available for Gimp users, this workaround is easy to apply and effective.
Cheers
David
 Helpful Posts: 0
Results 1 to 3 of 3
-
20th March 2010, 04:40 PM #1


- Join Date
- Apr 2008
- Location
- Cheshire and Dumfries & Galloway
- Posts
- 732
- Real Name
- David
The Gimp, Sharpening, "Blend If" Workaround
Last edited by David; 20th March 2010 at 04:57 PM. Reason: continuation of long post, errors, and additions
-
24th March 2010, 08:56 AM #2
- Join Date
- May 2008
- Location
- Blyth, Northumberland, NE England
- Posts
- 25
Re: The Gimp, Sharpening, "Blend If" Workaround
This looks very useful, David - thanks for your time and effort.
-
24th March 2010, 10:43 AM #3Moderator

- Join Date
- Feb 2009
- Location
- Glenfarg, Scotland
- Posts
- 21,402
- Real Name
- Just add 'MacKenzie'
Re: The Gimp, Sharpening, "Blend If" Workaround
David
Excellent. Thank you. Wasn't getting it at first, but then realised I was not inverting back the second mask that had been inverted when created.
Cut and pasted into the ever-valuable 'How to' document.


 Reply With Quote