
First of all let me say I know white balancing a JPEG file or any processed image in general is not a new idea.
I simply wanted to apply the theoretical concepts about linear edition and white balance to try to correct a wrong white balance obtaining a result as close to what we would have obtained if the image had been properly white balanced at RAW development, without leaving Photoshop.
White balance implementation is actually an exposure correction of at least 2 of the RGB channels of the image, so I will just convert the wrong white balance image into a linear profile and individually correct exposure of the RGB channels to correct it. In the end the image will be again de-linearized for proper additional edition.
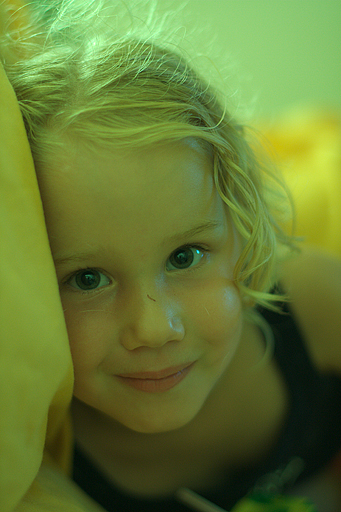
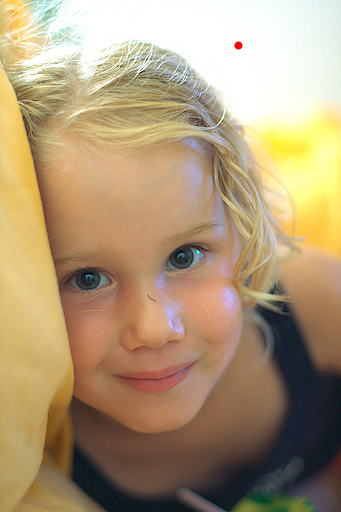
We start from a crazy white-balanced image (JPEG):
1. Convert image to 16 bits to avoid shadow posterization in the next operations
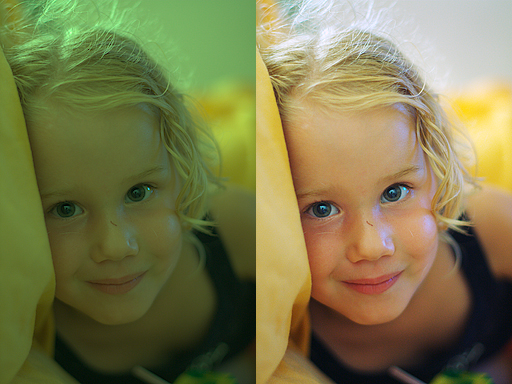
2. Linealize the image from the currect colour profile to some linear profile (linear versions of common profiles can easily be generated just by setting gamma=1.0 in PS). Find here linear versions of both sRGB and Adobe RGB.
3. With a curve mask layer, we set the white point in any neutral (R=G=B ) area of the original scene. This is a weak point of the method since not all images have truly neutral elements; in those cases some manual trials will be necessary.
In my image I took the white wall in the background:
4. To avoid the burnt areas that the curves produced, we create another curve mask layer and set it between the image and the curve mask layer created in the previous section:
This new curve will be another straigt line to reduce exposure until we get no burnt areas:
5. The last action will be put all layers and image together (CTR+E) and convert again to the desired output profile. This will gamma correct again the image and this is needed since Photoshop is not adequate for linear edition.
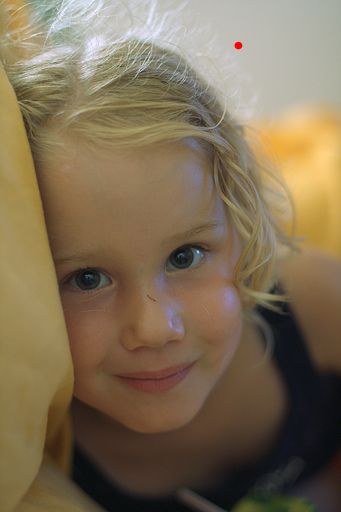
The image will now be properly white balanced and ready to be edited to get the best of it:
Explained with more detail in (Spanish): BALANCE DE BLANCOS JPEG.
(Added) I have to say that it is actually not necessary to convert to a linear profile to apply the procedure, since any scaling factor f can be extracted from the exponential gamma term, to be a scaling factor again: (f x rgb)^(1/g) = f^(1/g) x rgb^(1/g)
So only sRGB which has a non-pure gamma curve applied must be first converted to some other colour profile with a pure gamma (Adobe RGB for instance would serve well).
BR
 Helpful Posts: 0
Results 1 to 7 of 7
-
10th July 2008, 08:46 PM #1

- Join Date
- May 2008
- Location
- Madrid (Spain)
- Posts
- 169
TUTORIAL: White balancing JPEG in Photoshop
Last edited by _GUI_; 12th July 2008 at 11:28 AM.
-
11th July 2008, 02:42 AM #2
- Join Date
- May 2008
- Location
- Pittsburgh PA, St. Augustine FL
- Posts
- 136
Re: TUTORIAL: White balancing JPEG in Photoshop
Very nice Tutorial---and great results........
Some of us live outside of PS and have to work differently.....
As an example to White Balance this image, I would use levels on the RGB image...
I would select select Red, move both ends to encompass the active parts of the histogram and then move the center for setting the red balance....this would be followed by blue then green and finally the overall value to get a color balance....
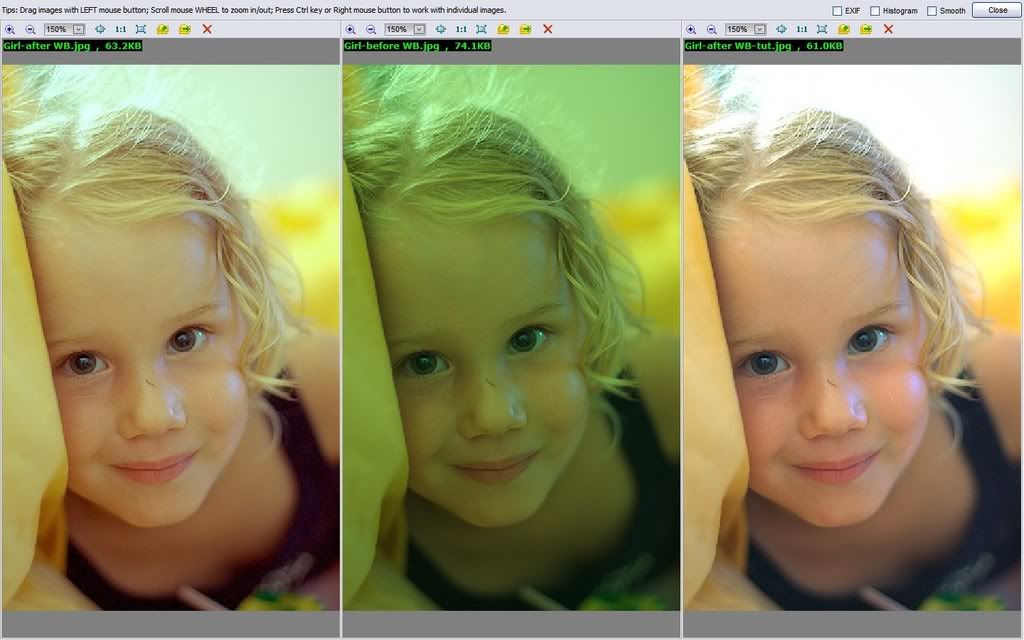
This gives me the following...based om my color perception....my slightly yellower version (less pink) is on the left with yours on the right......now I would proceed with editing where I would do the final color balance and set the lightness....
Last edited by willgoss; 11th July 2008 at 01:44 PM.
-
11th July 2008, 11:29 AM #3
- Join Date
- May 2008
- Location
- Madrid (Spain)
- Posts
- 169
Re: TUTORIAL: White balancing JPEG in Photoshop
willgoss, you missed to avoid burning the high light areas (step 4). I cannot check here but probably partial saturation in the R channel changed the hue of many areas of your version.
-
11th July 2008, 02:49 PM #4
- Join Date
- May 2008
- Location
- Pittsburgh PA, St. Augustine FL
- Posts
- 136
Re: TUTORIAL: White balancing JPEG in Photoshop
Thanks for the comment...You are right, I didn't use a second curve for blending.......
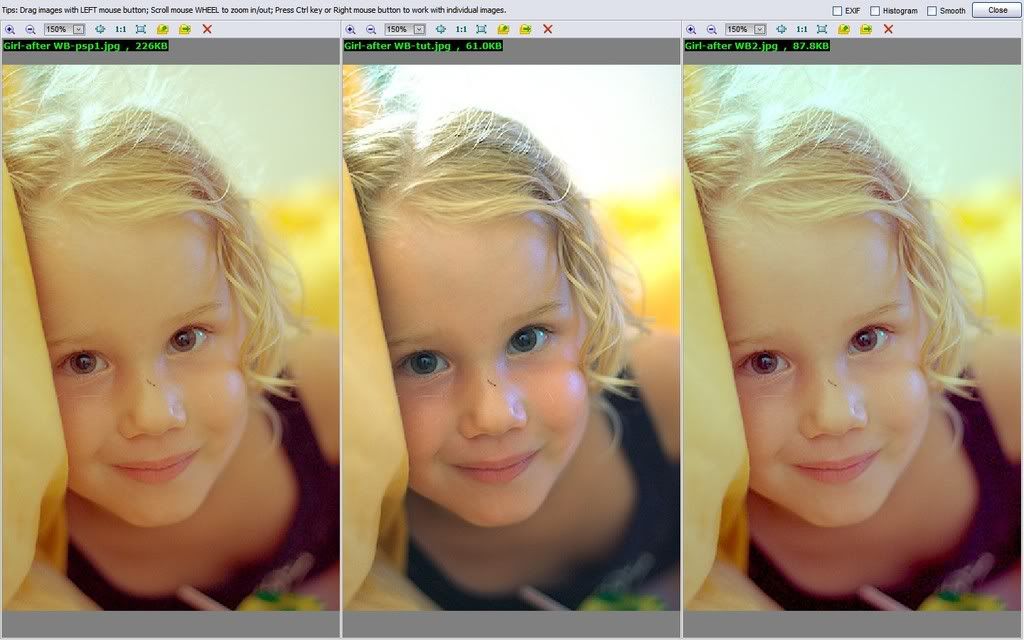
I was doing a typical white balance for a poor image.....normally with a better image I would do an Auto White balance that is not successful for this type image.....I did repeat my process in 2 different programs to compare the Levels results.......
It produced the following......with the Tutorial (step 3) results in the middle....the main difference, to my eye, is that the Tutorial WB has more of a blue cast, than I allowed, as seen in the eyes...
Now back to the drawing board to cee how easy I can add the Step 4 curve adjustment...this is fun and I am learning things I thought I knew....Last edited by willgoss; 11th July 2008 at 06:41 PM.
-
25th July 2008, 05:43 AM #5New Member

- Join Date
- Jul 2008
- Location
- USA - USVI
- Posts
- 4
Re: TUTORIAL: White balancing JPEG in Photoshop
Very nice tutorial GUI !
There would still appear to be color casts in both results.... blue cast in GUI's and red in will's. Could this be due to using the wall as a reference for the white point? We don't really know it was a white wall do we? Unfortunately, there are no real good reference points in the image, which makes it particularly difficult. In the end, as long as we can identify the remaining color cast, we can remove it. It just makes it more difficult for someone else to follow along.
-
29th July 2008, 11:15 PM #6
- Join Date
- May 2008
- Location
- Madrid (Spain)
- Posts
- 169
Re: TUTORIAL: White balancing JPEG in Photoshop
the blue cast is the TV set reflection. Impossible to eliminate without zone processing. Originally Posted by TommyO

-
30th July 2008, 02:18 AM #7
- Join Date
- May 2008
- Location
- Pittsburgh PA, St. Augustine FL
- Posts
- 136
Re: TUTORIAL: White balancing JPEG in Photoshop
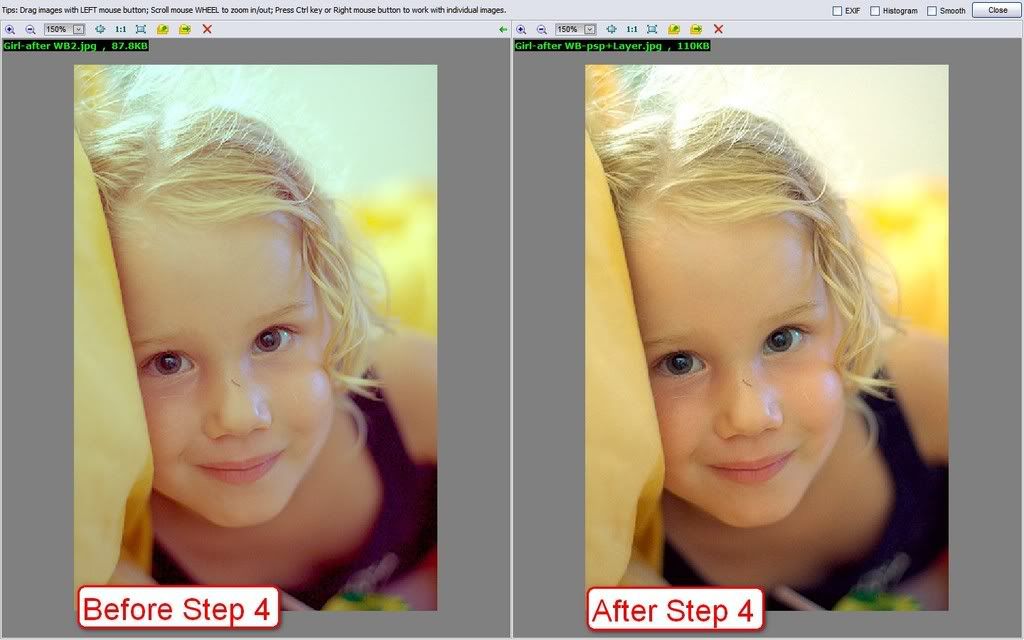
In my case, I did continue by trying the step 4 layer......It was attempted to gain a good face tone that does add a little blue in the eye area.....

 Reply With Quote