
 Helpful Posts:
 I'm still learning to edit, and I sometimes practice on my own with the editing challenges, however I don't post my practice edits because they are really bad.
PP Challenge #17
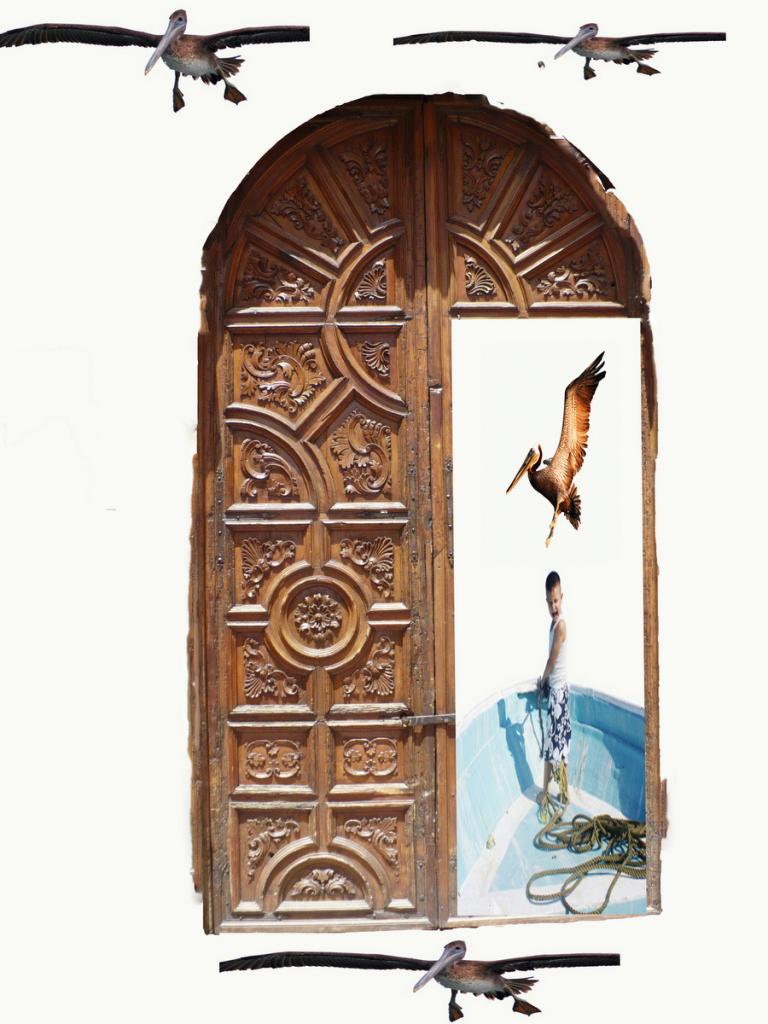
This months challenge intrigued me because I had a fantastical vision of a pelican in flight carrying the door on it's back, and a view of a little boy on a boat through the open door. My final version ended up being a photo of just the door, which is now green, with a pelican across the middle of the door.
Challenges
1. How does one place a different photo in a specific position on another photo?
2. How does one re-size another photo to fit inside the door? ie; how do you measure the width of just the door in the photo so you know how to re size the photo you wish to place in the door?
3. When I tried using the eraser tool to erase parts of the photo, it left eraser marks on the photo? How does one eliminate the pink eraser marks? Is it better to select parts of the photo and delete the selection which leaves a white background?
Thank you.
Results 1 to 20 of 25
Thread: That Door - Thoroughly Puzzled
-
23rd January 2013, 03:56 PM #1


- Join Date
- Jul 2011
- Location
- British Columbia, Canada
- Posts
- 7,244
- Real Name
- Christina
That Door - Thoroughly Puzzled
-
23rd January 2013, 04:19 PM #2
- Join Date
- Aug 2010
- Location
- Stockholm, Sweden (and sometimes Santiago de Cuba)
- Posts
- 1,088
- Real Name
- Urban Domeij
Re: That Door - Thoroughly Puzzled
I think the clue is to use layers. You use a layer to put the foreign object into the other photo, and you can resize that layer. You can also decide what layer is in front and which one is background. You always work on the top layer. If you want to work on another layer, you can temporarily put the one you don't want to work on in the background.
Then when you want to eliminate parts of the layer, you erase just on that layer and leave the background photo as it is. There should not remain any eraser marks but the layer becomes "transparent" where you erased it. Then later in the process, you might have to "flatten" the image to make it a jpeg, and then it loses its layers and becomes one "solid" object.
-
26th January 2013, 02:07 AM #3
- Join Date
- Jul 2011
- Location
- British Columbia, Canada
- Posts
- 7,244
- Real Name
- Christina
Re: That Door - Thoroughly Puzzled
Perhaps their is an on-line tutorial or another link that someone could direct me to, for learning how to use layers to combine photos? I performed an internet search but all I can find are links advising on how to merge photos, and select parts of a photo for the sole purpose of placing it in another photo. And my Elements 9 book does not cover the topic.
Thank you in advance.
-
26th January 2013, 02:38 AM #4

- Join Date
- Sep 2012
- Location
- Nomadic but not homeless, ex N.Z. now Aust.
- Posts
- 4,167
- Real Name
- Paul

Re: That Door - Thoroughly Puzzled
This is just one of many clips showing how to do it - http://www.youtube.com/watch?v=5yfgqMuM2pI Originally Posted by Christina S

-
26th January 2013, 09:39 AM #5
- Join Date
- Apr 2012
- Location
- Dunedin New Zealand
- Posts
- 2,697
- Real Name
- J stands for John
Re: That Door - Thoroughly Puzzled
It is a lot easier if you can arrange each image on a separate layer, but with logical care and order it is possible to do it with just the paste tool in simpler editors. One needs to arrange the correct size prior to copying and pasting that you need it in the final image. You probably will need to cut out the subject of each subject and organise it with a transparent surround. This may not be possible with your editor. And do the copying in the right order so that one is adding the boy in the boat to the bird/door image. Not sure if this tip is valid or any help to you but I discoveered that when an image is called the 'background' in the layers palette you cannot make part of it transparent until one renames it with some other title such as Originally Posted by Christina S
raster one etc.
I did work out how to make a very complicated montage, the teddy bears I collected as suveniers as I travelled around the States. back in the days when I only had MS Paint as my editor. It is possible but definitely you need to get an editor with layers

This was done with MS Paint from your idea and isn't really a valid result becuase with Paint one can only select rectangles with the select tool which you use to select the area you want to copy.
First I drew the door and copying its rectangle I noted the pixel size before drawing the bird on another opening of Paint but on a larger screen. Filled the rest of the area around the bird with a 'blue ' sky. Then I pasted the door across from the other edition of Paint and placed it under the legs. cheating a bit to erase the triangle under the door after the paste, pretty rough because One cannot select a triangle in Paint and the the erase tool is just a square. I then measured the number of pixels available in through the open door [16x190] and setting up a new page with height of 190 pixels I drew the boy in the boat before copying just 16x190 of him and pasted onto the bird-door image. Final stage was to 'pick' the colour of the sky and fill the area above the boys head ... easy enough with a line drawing becuase the lines create the area There was also the area under the door to be filled with water. Early on I measured the door when I copied it and made the bird on a bigger screen size so that the door would fit to bird's legs. I should have made notes as I did it
Thankyou for setting the exercise which I enjoyed though as to if it could be done with photographs I am pretty sure the answer is NO Though maybe I will try it with a seagull photo I have I have an open door photo somewhere too .....
Last edited by jcuknz; 26th January 2013 at 10:01 AM.
-
26th January 2013, 03:50 PM #6
- Join Date
- Jul 2011
- Location
- British Columbia, Canada
- Posts
- 7,244
- Real Name
- Christina
Re: That Door - Thoroughly Puzzled
Thank you, L. Paul for the link. Appreciated.
Photo Nut, thank you for the detailed explanation, especially how to figure out the correct size. It's more complicated than I thought, but I'll keep practicing. If you try it with your seagull and open door photo, I'd love to see it.
-
26th January 2013, 05:40 PM #7
- Join Date
- Jan 2011
- Location
- Tennessee
- Posts
- 1,732
- Real Name
- james
Re: That Door - Thoroughly Puzzled
Christina photoshop has steep curve , I have found " Photoshop elements 9 for dummies" Insultingly useful. The u-tube videos are priceless, I am just starting to wrap my mind around the layers concepts so I have not tried to resize portions of one to proportionaly fit another image. I am sure others here can steer you in the direction you seek.
-
26th January 2013, 06:07 PM #8
- Join Date
- Jan 2009
- Location
- South Devon, UK
- Posts
- 14,869
Re: That Door - Thoroughly Puzzled
Probably, we need a few actual images of yours to play around with, Christina.
For me, the one image which was a bit different from that challenge was Jeff's entry (#14) which tends to sum up what I think you want to know.
However, regarding image (on a layer) resizing. Get the starting images roughly around the correct size and placed as layers.
The usual practice of selecting each image then pasting as a new layer should allow you to construct a suitable stack.
Ctrl+A to select; Ctrl+C to copy; hide or close original image Ctrl+W (be careful not to change the original when closing); Ctrl+V to paste.
For final close resizing, go to Edit Menu - Transform and choose the required option. Drag the transform points as required for Scale, Skew, Rotate, etc.
There are several methods to remove a selected area (cut) or erase (either with a brush or one of the auto controls).
Not really easy to give firm advice about any one particular editing option being the best for all circumstances.
-
26th January 2013, 07:52 PM #9
- Join Date
- Jul 2011
- Location
- British Columbia, Canada
- Posts
- 7,244
- Real Name
- Christina
Re: That Door - Thoroughly Puzzled
Thank you James. Sounds like a perfect read for me. I will get myself a copy this week.
-
26th January 2013, 08:13 PM #10
- Join Date
- Jul 2011
- Location
- British Columbia, Canada
- Posts
- 7,244
- Real Name
- Christina
Re: That Door - Thoroughly Puzzled
I would be very appreciative if anyone feels like playing around with my photos so I, and others can try and learn.
Thank you for the detailed tips on resizing and layers. I suspect it is a bit beyond my editing skills at this time, but I will print and save as a handy reference.
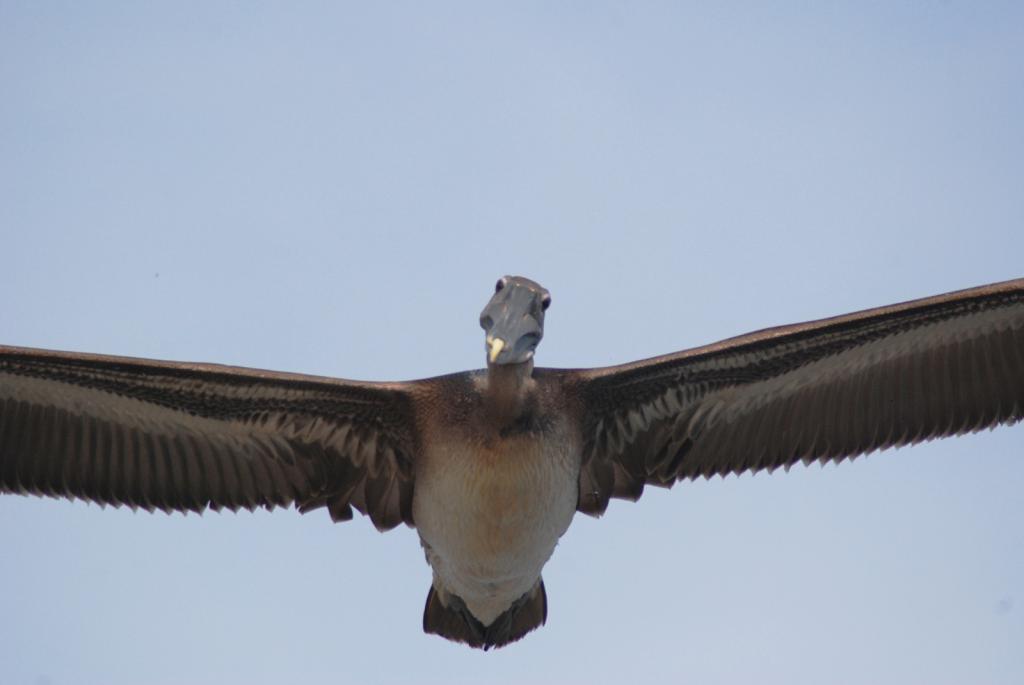
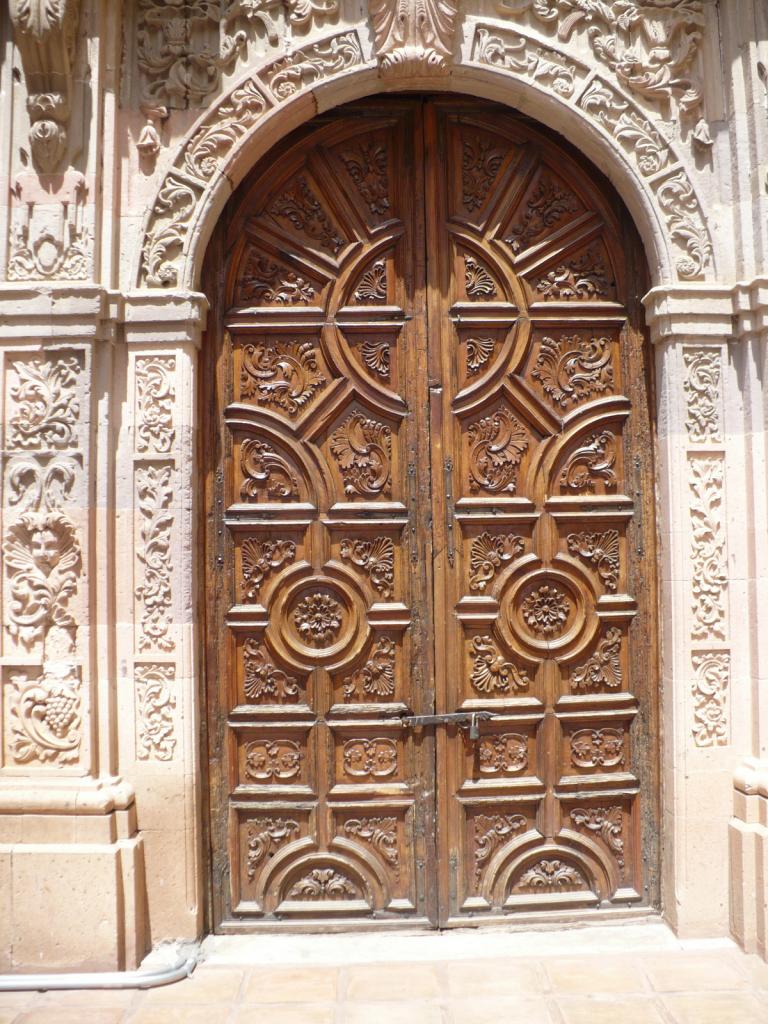
Pasted below a few shots to choose from. A couple of door shots, a couple of pelicans on which the door could be placed on top of, a couple of bird shots with dangling feet that could carry the door, and the boy on the boat which I envisioned in the door. I posted full size and the originals if I had them so their is more room to play.
Actually, I will post the photos later. It seems my photobucket account is full, and I deleted a bunch of photos so I could upload the photos I said I would upload, and even though it says the upload was successful, I can't find the photos in my library. Until later... Thank you.
-
26th January 2013, 08:47 PM #11
- Join Date
- Apr 2012
- Location
- Dunedin New Zealand
- Posts
- 2,697
- Real Name
- J stands for John
Re: That Door - Thoroughly Puzzled
I forgot to mention that in the action of pasting so long as the 'marching ants' are around the selection it can be not only placed in any position but as I found out by accident recently can be adjusted in size but once you click the mouse on the image and they vanish you are stuck with that ... whereas with separate layers you can go back and adjust and refine the arrangement.
Since Lightroom apparently doesn 't have layers you could download the free 'Paint.Net' which I assume* is a successor to the rather simple Paint I was using and see what it will do for you. With one particular task I did it with Photoshop, Paint Shop Pro, and Paint Net and ended up with very similar results .... how much that was my getting PN to do the job or the programme I don't know .. we got there.
*does anybody know if this is correct?Last edited by jcuknz; 26th January 2013 at 08:56 PM.
-
26th January 2013, 09:10 PM #12
- Join Date
- Jul 2011
- Location
- British Columbia, Canada
- Posts
- 7,244
- Real Name
- Christina
Re: That Door - Thoroughly Puzzled
Here are the photos, I had to re-size them to 1600 pixels.
To carry the door on its' back with a blue sky in the background
Either

or
or
To have the door dangling from its' feet (with a blue sky in the background)

or

or (just the bird)

View inside one of the sides of the door, or view inside the door saving the frame of the door

The Door

or
Perhaps it is impossible or too, complicated? And I'd be happy to see just how to edit the door with just a bird on the top or the bottom, or just with the boy in open window. Thank you in advance.Last edited by Brownbear; 26th January 2013 at 09:19 PM.
-
26th January 2013, 09:18 PM #13
- Join Date
- Jul 2011
- Location
- British Columbia, Canada
- Posts
- 7,244
- Real Name
- Christina
Re: That Door - Thoroughly Puzzled
Thank you for the tip. I have Photoshop Elements (and lightroom), and I'm trying to learn how to use layers. Originally Posted by jcuknz
-
27th January 2013, 12:08 AM #14
- Join Date
- Jan 2009
- Location
- South Devon, UK
- Posts
- 14,869
Re: That Door - Thoroughly Puzzled
Lock your doors - Giant birds are stealing children!

Those low resolution images don't have much in the way of sharp edges to work with. But I've had a quick edit to produce a rather silly composition; just for fun.
My basic workflow was: Starting with the gull.
Add an adjustment layer (eg Curves) to the starting images and set a suitable blend mode to increase contrast. Overlay blend for example. Extra tweaks of the curves may help. This is just to create some stronger edges to make selection easier.
Select around required areas with the Magnetic Selection Tool. Tidy up any poor bits with the Lasso Tool and vary the + or - options to add or subtract from the selection.
Hide or delete the adjustment layer.
When finished, copy and paste as a new image. Ctrl+C; Ctrl+N (set new image background to transparent) Ctrl+V.
Save image in a format which supports transparency, such as Psd.
Do the same for the boy.
Open the door image. Select the part of the door to be opened. Edit Menu - Transform; Skew and move the outer edges to look like an open door.
Edit - Transform and Scale to drag the required edge inwards, to help with the open door effect.
If the background image colour base has been set to black this should now appear behind the open door. If not you will have to fill with colour using the paint bucket.
Arrange the boy position across the door. Remove parts of his legs etc by using the Lasso Tool then Cut Ctrl+X. This will appear as though he is partly inside the door.
Add the bird and position with the Transform tools..
And that is that. Well more or less like that!
-
27th January 2013, 12:49 AM #15
- Join Date
- Jul 2011
- Location
- British Columbia, Canada
- Posts
- 7,244
- Real Name
- Christina
Re: That Door - Thoroughly Puzzled
Thank you Geoff. I love it. Can I do all those things you describe with Photoshop Elements?
And for the benefit of others to see what a novice can try to do
I watched this video http://www.photoshopelementsuser.com...another-image/
which taught me how to place photos in another photo, and to re-size photos within that photo to fit in the image.
1. I selected around the door, inverted the selection and deleted the rest of the door. I had great difficulty selecting the door nicely, even though I tried to refine the edge
2. I did the same with my other photos so I was left with just the part of the photo, I wanted to use. I re-sized these photos using Picasa because it was easier than figuring out the math in Photoshop Elements.
3. I placed the photos in the door photo using the File place command and the Window Panel Bin. I discovered the Move tool (a first for me) and dragged my photos to place where I could fit them.
4. I had great difficulty with placing, fitting the boy in the door, as you can see. (But he is in the door way which is a first for me)
However, even though my photo did not turn out beautiful as yours did, I worked with layers for the first time. And it was a little confusing because there is another door behind the door in the my photo that you can't see. I would have liked to fill all the the white with blue sky...I see that paint bucket might have worked for this?
I also tried to clone out the edges of the door to smooth my selection, and the spot by the pelican (up above) but the clone tool would not work, and I presume this has something to do with layers?
Here it is in all its glory (watch out for those birds!)
-
27th January 2013, 01:52 AM #16
- Join Date
- Jul 2011
- Location
- British Columbia, Canada
- Posts
- 7,244
- Real Name
- Christina
Re: That Door - Thoroughly Puzzled
Hi Geoff,
I've been trying to copy your instructions, and after I do this
When finished, copy and paste as a new image. Ctrl+C; Ctrl+N (set new image background to transparent) Ctrl+V.
I am left with a white photo, ie; white background, no photo to be seen anywhere? Thank you
-
27th January 2013, 03:25 AM #17
- Join Date
- Sep 2012
- Location
- Nomadic but not homeless, ex N.Z. now Aust.
- Posts
- 4,167
- Real Name
- Paul
Re: That Door - Thoroughly Puzzled
Try Ctrl+A first. You need to select the part of the image you want before you copy (Ctrl+A is select all) otherwise it does not know what to copy.
-
27th January 2013, 05:50 AM #18
- Join Date
- Sep 2012
- Location
- Nomadic but not homeless, ex N.Z. now Aust.
- Posts
- 4,167
- Real Name
- Paul
Re: That Door - Thoroughly Puzzled
I was in a bit of a rush when I made my previous reply. With a bit more time I read through the instructions you were working to. Below I think is where you slipped up with a mistake we all make now and again.
I have put in bold where Geoff did the selection. So you either lost the selection or were not on the image layer when you did your Ctrl+C. Originally Posted by Geoff F
I often flatten the layers of images I am about to copy so there is no risk of copying information from the wrong layer and all adjustments to the image are included in the copy. In the above method the adjustment layer needs to be off or discarded and the image flattened with flatten visible only which will discard any layers that are off. As there were only two layers just discarding the adjustment layer would have solved your problem. I must confess I never use Ctrl+N because I always copy to a new layer on the main image to which I am copying.Last edited by pnodrog; 27th January 2013 at 06:15 AM.
-
27th January 2013, 11:21 AM #19
- Join Date
- Aug 2010
- Location
- Stockholm, Sweden (and sometimes Santiago de Cuba)
- Posts
- 1,088
- Real Name
- Urban Domeij
Re: That Door - Thoroughly Puzzled
It's been ages since I used Elements, but I think you can resize without any maths, when you have your image on an adjustment layer above the other. Then in all editors I have used, resizing can be done by grabbing a handle and drawing on it. By pressing Shift at the same time, instead of distorting, size is altered. I think that worked also in my old Elements that I haven't used for many years now.
So when you drag, you see directly how it appears on the other image when positioned on top of it. It's all done visually. The layer can also be turned to any angle and repositioned all done by vision.
-
27th January 2013, 01:11 PM #20

- Join Date
- Nov 2011
- Location
- Essex, UK
- Posts
- 1,475
- Real Name
- John
Re: That Door - Thoroughly Puzzled
Hi Christina,
I liked your idea and could not stop myself from having a little play with it; hope you don't mind.
Used PSE9, layers, cloning, perspective adjustment, selective blurring and final sharpening to name but a few.
Cheers
John


 Reply With Quote