
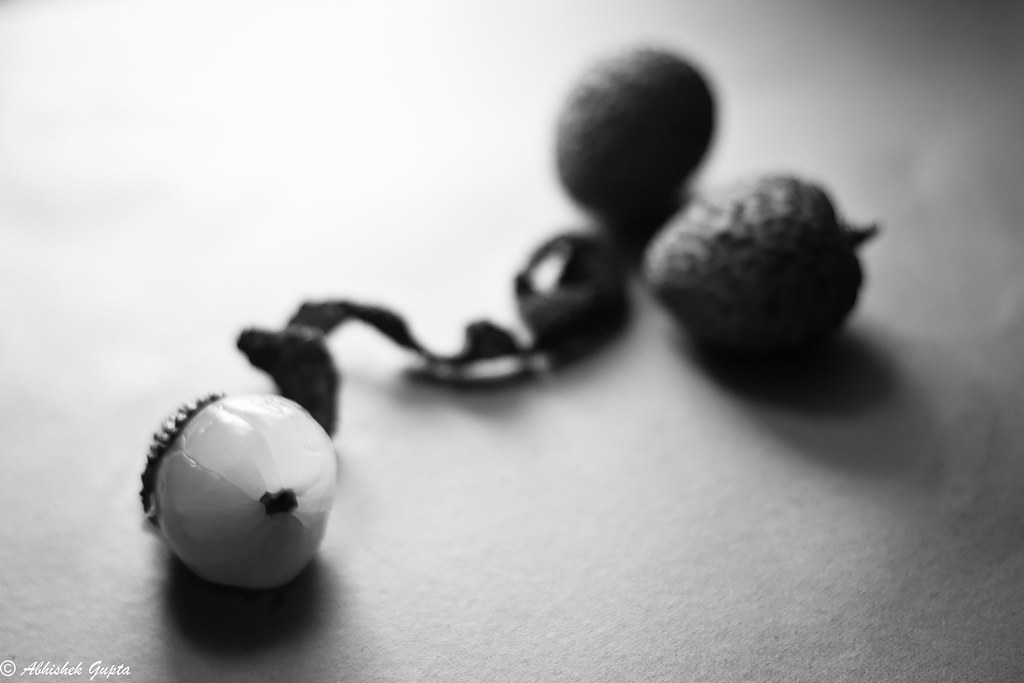
I am reading Photography-The Art of Composition, and one of the first exercises was to take some still life photos with points as prominent objects. It also gave me a chance to try out a studio setup for the first time.
So, here are some Lychees!How did I do? I am trying to learn the basics of composition and lighting, so C&C are very much appreciated.
Both photos taken with Canon Digital Rebel, Canon 50mm f/1.8 @ f/2.2, ISO 100. Top @f/2.2 for 1/15s, bottom @f/2.2 for 1/25s. PP in LR3.
 Helpful Posts: 0
Results 1 to 7 of 7
-
24th May 2011, 11:21 PM #1


- Join Date
- Feb 2011
- Location
- India
- Posts
- 408
- Real Name
- Abhi
My first try at a studio setup and a compositional exercise
Last edited by abhi; 24th May 2011 at 11:25 PM. Reason: Typo in title
-
25th May 2011, 04:29 AM #2

- Join Date
- May 2011
- Location
- Ontario, Canada
- Posts
- 283
- Real Name
- Shannon
Re: My first try at a studio setup and a compositional exercise
Great job !! I love lychee's too.. ! Can't wait to see the next exercise in the book.

-
25th May 2011, 05:20 AM #3rob marshall
Re: My first try at a studio setup and a compositional exercise
Abhi
The composition of this seems almost right. I would have placed the front lychee more on the bottom-left 'third spot'. This is yours

And here's a crop I did to get the stalk of the front fruit on the spot. I also increased the lighting considerably as it looked underexposed. I know you were asking about composition, but the lighting in a shot can alter considerable the spatial look of the subject, and so it does affect the composition, I think, by giving more depth.

Here's your shot with the Levels histogram. You can see how much light is lacking on the right of the graph. When using a cloth for a back-drop it's a good idea to iron out any creases first. I use either a piece of black art board (very cheap) or a velvet photography portrait backdrop, which is very smooth and even.

-
25th May 2011, 05:32 AM #4
- Join Date
- Feb 2011
- Location
- India
- Posts
- 408
- Real Name
- Abhi
Re: My first try at a studio setup and a compositional exercise
Thanks, Shannon. I ate them as soon as I was finished Originally Posted by Shambhala

-
25th May 2011, 06:07 AM #5
- Join Date
- Feb 2011
- Location
- India
- Posts
- 408
- Real Name
- Abhi
Re: My first try at a studio setup and a compositional exercise
Rob, Originally Posted by rob marshall
Thank you for the feedback, and for showing me how the image can be improved. I agree with you regarding lighting being an inherent part of the composition, and have a related question. When I started out with my pp, I was the highlights were blown out, and it looks like I with overdid the compensation.
In a setup like this, how can I improve the lighting in the photo to start off? Would the best solution be to use a reflector, or more ambient light to reduce the tonal range, or can I tweak the camera exposure settings to get a better output? I did take a photo with the reflector but the focus was a tad off , so no more focus and recompose when I use the tripod.
Lesson learnt. At 3 AM those creases did not look as badWhen using a cloth for a back-drop it's a good idea to iron out any creases first. I use either a piece of black art board (very cheap) or a velvet photography portrait backdrop, which is very smooth and even.
 .
.
-
25th May 2011, 01:13 PM #6rob marshall
Re: My first try at a studio setup and a compositional exercise
I do a lot of shots like these, and my basic method is to use lights (studio flash mostly) to control how the subject appears. It's easier with a light meter and flash as you can meter accurately and set your aperture to the appropriate level so it doesn't blow out - shutter speed has no effect upon flash as flash is so fast anyway. Having done that you can then use reflectors or perhaps an additional lower level light to 'fill-in' and dark areas, and that will give your scene more 'shape'. Originally Posted by abhi
With ambient light, it's a bit more time-consuming, and shutter speed does make a difference, but you can essentially do the same thing. Your camera has a built in light meter, so just switch to spot metering and meter the brightest spot. Set the camera to those settings and the shot will not be blown (or reduce the very bright light by diffusing it). But, you may well have dark areas, so you can introduce reflectors such as white card for small objects. You can also introduce artificial lights to fill in (even a diffused torch will work) and provided the brightness of that light is not greater than the spot you metered for you will be OK.
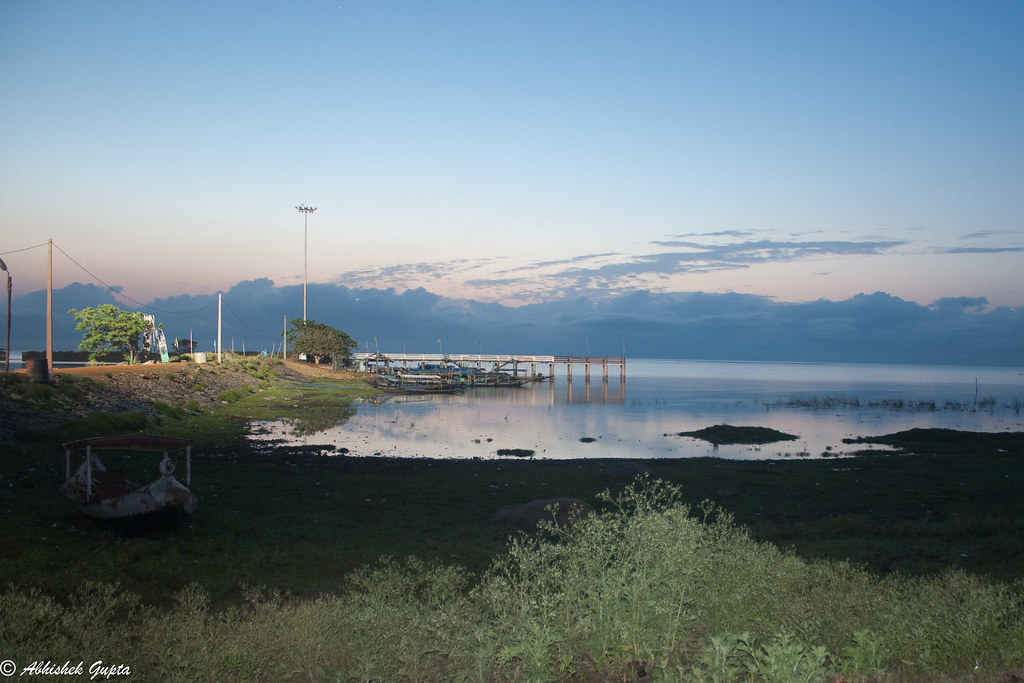
Of course, you can always use 'fill light' in RAW edit to bring up the dark areas, but it's best to get it right in the camera if you can. For landscapes it's more difficult. In this shot that I took on Monday, I metered for the very bright sky. That left the front of the boats too dark, so I used in-camera flash as a fill-in, and you can see how the front of the boats and the water are illuminated. It also left the tree areas a bit dark, so I just used 'fill light' in RAW edit for those.

-
25th May 2011, 02:20 PM #7
- Join Date
- Feb 2011
- Location
- India
- Posts
- 408
- Real Name
- Abhi
Re: My first try at a studio setup and a compositional exercise
Thanks for sharing your technique, and tricks, Rob. Originally Posted by rob marshall
I never thought about the fact that ambient light affects the shutter speed whereas reflectors and secondary light sources do not. I will keep this in mind. I do not have a spot meter so I usually use center weighted metering if camera's evaluative metering does not do the trick. And usually I do not think of diffusers, though I did use one earlier today for photographing oranges. For landscapes, I do use the built in flash as a fill light when I can, such as for this shot which is SOOC with a crop:
The ground in the middle will a candidate for fill light. Thank you again, Rob
Last edited by abhi; 25th May 2011 at 02:29 PM.


 Reply With Quote