INTRO TO MACRO PHOTOGRAPHY
Macro and close-up photography can take the viewer to new and seldom seen vantage points. However, macro photography also often demands more careful attention to photographic technique. This introductory article discusses how to improve the quality of your macro photographs.
ACHIEVING HIGH MAGNIFICATION
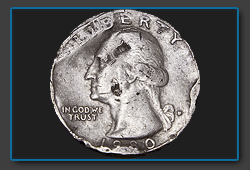
Magnification describes the size an object will appear on your camera's sensor, compared to its size in real-life. The closer you place your lens relative to the subject, the larger that subject will appear in the image. For a technical overview of magnification, see the tutorial on macro lenses: magnification, effective f-stop & depth of field.
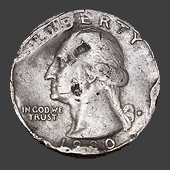 Full Size Object
(24 mm diameter)
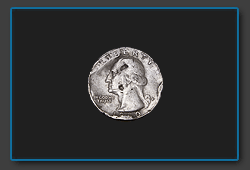
| 1:1 or 1X Magnification |
| 1:2 or 0.5X Magnification |
| 1:4 or 0.25X Magnification |
All illustrations above are shown to scale; — = borders of digital camera sensor.
If you are using a compact digital camera, then setting this to "macro mode" will enable closer focusing distances — and greater magnifications. If you are using a digital SLR camera, then your options are more numerous. You will need to either (i) use a dedicated macro lens or (ii) improve the magnification capabilities of one of your existing camera lenses by adding an extension tube or a close-up lens (amongst other options).
MACRO SHARPNESS, TRIPODS & FINE CONTROL
When you magnify a subject, you also magnify movements caused by camera shake. Standard shutter speed requirements therefore no longer apply (such as the common one over focal length rule). Furthermore, small variations in camera position can also make huge differences in subject composition. It's therefore critical to either experiment with what you're capable of capturing hand-held, or to just always use a camera tripod.
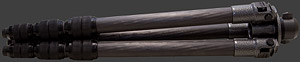
Using a tripod slows down the composition process, which often causes one to become more meticulous, and to think more about how the subject is being portrayed — both of which are important traits for producing a successful macro photos. However, not all tripods are capable of or convenient for taking photos near the ground (as is often required with macro subjects). Special macro tripod requirements include:
- Tripod legs need to be capable of spreading nearly horizontally, so that the camera can be lowered all the way to the ground. Achieving such a low camera height usually also requires removing the tripod's center column.
- Tripod head needs to be capable of very finely and precisely controlling the camera's position. Ball heads are typically less capable of this than pan/tilt heads, because they often droop slightly after positioning, and usually don't allow for independent vertical, horizontal and rotational movements. On the other hand, ball heads allow for a greater range of camera positions, and enable more flexible camera movement.
If a tripod isn't convenient, successful control can often also be achieved by setting your camera on the ground and positioning it by placing small rocks or other objects underneath the camera (such as your lens cap). Alternatively, photos of living creatures may make tripod use impractical, but this usually necessitates using a camera flash (as discussed later).
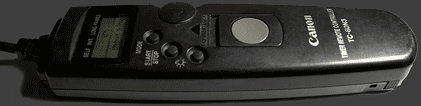
Finally, using a remote switch or shutter release device (such as the one shown above) can also greatly improve the sharpness and control over macro photos, because the camera no longer moves as a result of you pressing the shutter button. Alternatively, setting the camera to a 10 second self-timer mode can also minimize camera shake, but this approach doesn't have the advantage of preserving the composition, because the shutter button still has to be pressed to start the timer (potentially nudging the camera).
MACRO FOCUSING & DEPTH OF FIELD
Photos at high magnification have a correspondingly shallow depth of field. Precisely controlling the location of focus is therefore much more important than normal. This requires not only artistic decisions about what should be in sharpest focus, but also technical decisions about how to make the most of this sharpness.
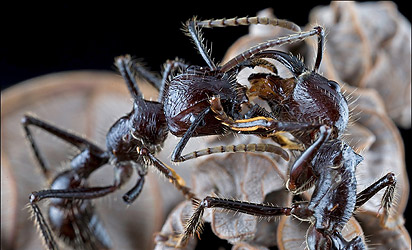
Photo courtesy of Piotr Naskrecki, author of "The Smaller Majority."
Fortunately, the location of sharpest focus appears much more pronounced in the viewfinder when the subject is under high magnification. However, just because it's easy to see doesn't necessarily mean that it's also easy to position. Even small errors in a camera's autofocus can be disastrous for an image, so this should only be used as a rough guide; precision adjustments should almost always be done using manual focus. In addition, special equipment can be very helpful for improving focus control:
- Focusing Rail. This fits in between your tripod head and camera body, and precisely guides your camera so that the location of focus is determined by camera position instead of the (less precise) manual focus ring.
- Magnifying Eyepiece. This attaches to your viewfinder to enlarge visibility.
- Right Angle Viewfinder. This attaches to your viewfinder so that you can more comfortably see through it when the camera is really low to the ground.
- Rear Live View LCD Screen. Cameras capable of showing their subject on the rear LCD screen in real-time can greatly assist with composition and focus.
For maximal sharpness throughout, adjust the angle of your camera so that the plane of sharpest focus aligns with the surface of your subject. Alternatively, for a more abstract look, try aligning the plane of sharpest focus so that it's perpendicular to your subject's surface. With creatures, it's almost a universal rule that a subject's eyes should be the location of sharpest focus, although other subjects aren't always this simple.
OPTIMAL MACRO APERTURE
The aperture setting of your camera lens controls two often competing factors: (i) the resolution and sharpness at the focusing location, and (ii) the range of distance that will appear acceptably sharp ("depth of field"). A high f-stop improves depth of field, but too high of a value will also begin to compromise image resolution (due to lens diffraction).
Macro photography often has an extremely shallow depth of field, so sacrificing some resolution is usually acceptable. With digital SLR cameras, aperture settings of f/11-f/16 provide a good trade-off between depth of field and resolution, but f/22+ is often necessary for extra (but softer) depth of field. Compact cameras can get away with much lower f-stop values, such as f/5.6-f/8.0. Ultimately though, the best way to identify the optimal aperture setting is to just experiment.
BACKGROUND & COMPOSITION
Macro photography often requires pre-visualizing how one plans to capture their subject, in addition to carefully controlling the environment under which this subject is captured.
Pre-visualization & Composition. Based on everything discussed thus far, you've probably come to the conclusion that positioning and focusing a camera for a macro photograph can be very time-consuming. One therefore needs to have a good idea of what they have in mind ahead of time. Observing objects with a magnifying glass or the rear LCD on a compact camera can make it much easier to identify and compose a subject.
Background. In macro photography, the background is often so out of focus that it appears as a solid or smoothly varying patch of color. It's important to choose a background which complements the color and tone of your foreground subject. Fortunately, one can often pick a different background by simply shifting the camera's vantage point. One should also take care to avoid placing distracting out of focus highlights or other objects behind their subject.


Above photos courtesy of Piotr Naskrecki.
As a last resort, don't be afraid to reposition objects to improve the background. This might include positioning an object (or your hand) out of the image so that it shades an otherwise distracting and strongly-lit background component.
Finally, be careful not to over or under-expose your image when using dark or light backgrounds, respectively, since these can trick your camera's metering system into thinking that the amount of incident light has decreased or increased. Adding some negative or positive exposure compensation can offset this effect.
Location. Avoid even small breezes with flowers and other foliage, either by placing your camera bag somewhere that reduces wind, or by shooting your object indoors. Fortunately, nobody is able to tell the difference between an outdoor and an indoor macro shot — as long as the background is carefully chosen and positioned. Also consider bringing a spray bottle so that you can add dew to the surface of subjects where needed.
MACRO LIGHTING
The type of light can play an important role in either enhancing or concealing the appearance of detail. Pay careful attention to the contrast, color and direction of natural light. Higher contrast (more localized) light tends to enhance texture, but its direction also plays a role:
- Back lighting can create silhouettes or halos around subjects — emphasizing shape.
- Front lighting ensures that shadows aren't clearly visible — resulting in a flat and two dimensional appearance, but also illuminating everything which is visible.
- Side lighting casts distinctive shadows — enhancing surface texture, but often also concealing other details behind dark shadows.
- Bottom and top lighting are often least ideal, primarily because they have the disadvantage of deep shadows, but often lack the advantage of giving a three-dimensional look to the subject. On the other hand, if the light source is sufficiently diffuse (low contrast), then this lighting direction can also achieve good results.
However, as with most things artistic, there's no universal rules for what constitutes the best light; this will depend on your subject and creative intent. When natural lighting isn't ideal (and using a flash isn't an option), a light reflector can add a sideways (or other) component to otherwise harsh overhead sunlight — thereby decreasing image contrast. Just make sure to position the reflector so that it illuminates the unwanted shadows.
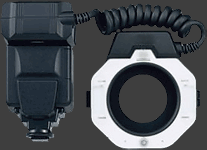
Macro Flash. Using a camera flash can greatly improve the appearance of macro subjects, and can even enable shots to be taken hand-held when this wouldn't otherwise be possible in natural lighting. However, with close focusing distances the lens can often get in the way of the flash — casting unsightly shadows on the subject and increasing the necessary exposure time. Using a dedicated macro ring flash or other off-camera flash can help fix these problems, although this is a whole other topic unto itself.
For additional macro photography articles, also see this website's tutorials on:
Macro Lenses: Magnification, Depth of Field & Effective F-Stop
Macro Extension Tubes & Close-up Lenses