
I'm relatively new at this. I am processing my pics with Canon DPP and I want to upload them to a gallery at PBase. Is there an optimal "output resolution" to use when converting the files from raw to jpeg format? Do I need to "resize" the image for transfer to PBase? Lastly, in looking at a few trial uploads it seems that the quality of the images as they appear in DPP are significantly better than how the image appears on PBase. Anyone else have similar experiences?
Thanks
 Helpful Posts: 0
Results 1 to 19 of 19
-
11th October 2009, 05:38 PM #1

- Join Date
- Oct 2009
- Posts
- 15
Canon DPP Processing for PBase Upload
-
11th October 2009, 07:11 PM #2
- Join Date
- Dec 2008
- Location
- New Zealand
- Posts
- 17,660
- Real Name
- Have a guess :)
Re: Canon DPP Processing for PBase Upload
Hi Altosax,
Resolution isn't important - the only thing that matters is the number of pixels, which in turn is determined by how big you'd like the images to appear on monitors when displayed at 100% size.
For PBase I use 1024 pixels wide, but then again, I usually shoot in a 2:1 aspect ratio, and I like the extra width. For normal 1:1.5 aspect ratio a horizontal image that's 800 pixels wide would be a good minimum size, but you can go larger. It's really just a trade-off between something that's big enough to look good, but not so big that it chews through all of the storage space that you've bought.
Hope this helps!
-
11th October 2009, 07:17 PM #3
- Join Date
- Jan 2009
- Location
- South Devon, UK
- Posts
- 14,417
Re: Canon DPP Processing for PBase Upload
Canon DPP is a rather basic programme but is probably sufficient for what you mention.
I don't think there is a recommended size for Pbase but I normally use 800 pixels wide by 96 ppi. and convert to JPEG at 90-100% compression. But I am starting with an uncompressed TIFF image.
After doing any substantial resizing I always give the image a little bit of Unsharp Mask. If the original has already been sharpened I find that something around 30-50% and 1 pixel radius usually works OK but other people may have different preferences.
And I sometimes do the resizing in 2 stages if there is a substantial alteration in size.
At the moment, I'm not sure what DPP has in the way of sharpening; I will have to check this out.
-
11th October 2009, 07:31 PM #4Moderator

- Join Date
- May 2008
- Location
- Windsor, Berks, UK
- Posts
- 16,737
- Real Name
- Dave Humphries :)
Re: Canon DPP Processing for PBase Upload
Hi altosax,
I don't use DPP, but I do use PBase.
What you have to remember is that when viewed in DPP, you are probably viewing the full res image, typically 4000 pixels width.
There is nothing to stop you uploading full res images to PBase, the biggest downsides are;
1) You will get through your 500MB quota quite quickly (obviously depends on how many MP your camera is) and
2) For web viewing, full resolution will take too long to download for most people
3) You risk someone ripping off your work and passing it off as their own
I generally tend to upload at 1024 pixels width and get my photos down to this size in PS Elements.
I have put links in to demonstrate the way PBase works: if you upload at 1024px, PBase creates 3 more pictures;
small at 160px
medium at 400px
large at 800px
My original upload was at jpg quality 9, PBase almost certainly makes these smaller pics at a lesser jpg quality, so these are probably what you are unhappy viewing, as there will be more jpg artefacts in them. It defaults to showing you the 400px medium given half a chance, so when linking into posts here using direct linking, always change the word "medium" to "original".
Here's a demo, I too will be interested to see the difference;
Medium

Original
Hope that helps and builds on the other answers posted while I have been typing,
-
11th October 2009, 11:00 PM #5
- Join Date
- Oct 2009
- Posts
- 15
Re: Canon DPP Processing for PBase Upload
Thanks to everyone who has responded. Your comments have been very helpful. It's obvious I'll have to invest more time in learning the basics.... I have uploaded 3 images to PBase and these are the numbers that appear in the gallery "edit" :
Image #1:
7801281 bytes
2336 x 3504 pixels
http://www.pbase.com/image/118172842
Image #2:
3847030 bytes
2743x2067 pixels
http://www.pbase.com/image/118172599
Image #3:
5114717 bytes
3504x2332 pixels
http://www.pbase.com/aldodefilippi/i...18170443/large
Are you suggesting using 1024 pixels for width output instead of the above values? What about height value? Does it default to a number once the width number is entered?
thanks again to all
a.d.f.
-
11th October 2009, 11:53 PM #6
- Join Date
- Dec 2008
- Location
- New Zealand
- Posts
- 17,660
- Real Name
- Have a guess :)
Re: Canon DPP Processing for PBase Upload
I'll look forward to viewing them when they've finished loading ... and loading ... and loading ... Originally Posted by altosax

That's our point ... your average monitor has a resolution of around 90ppi - so your images would display wonderfully if we all had monitors around 40 inches wide, and 25 inches high, but unfortunately, we don't (well not yet anyway). So - as a rule of thumb, decide how big you'd like your images to be viewed on someones screen (in inches) - multiply that by around 100 - and then make the images that many pixels wide and high.
So if you resize an image to be 900 pixels wide by 600 pixels high then it'll display somewhere around 9 inches wide by 6 inches high on peoples screens ("ball park" maths) which is usually heaps big enough. And the good news is that at this size the file will only be around one tenth the size of the full size image - or put another way - you'll get 10 times as many on pBase for the same storage allocation.
Does this help?
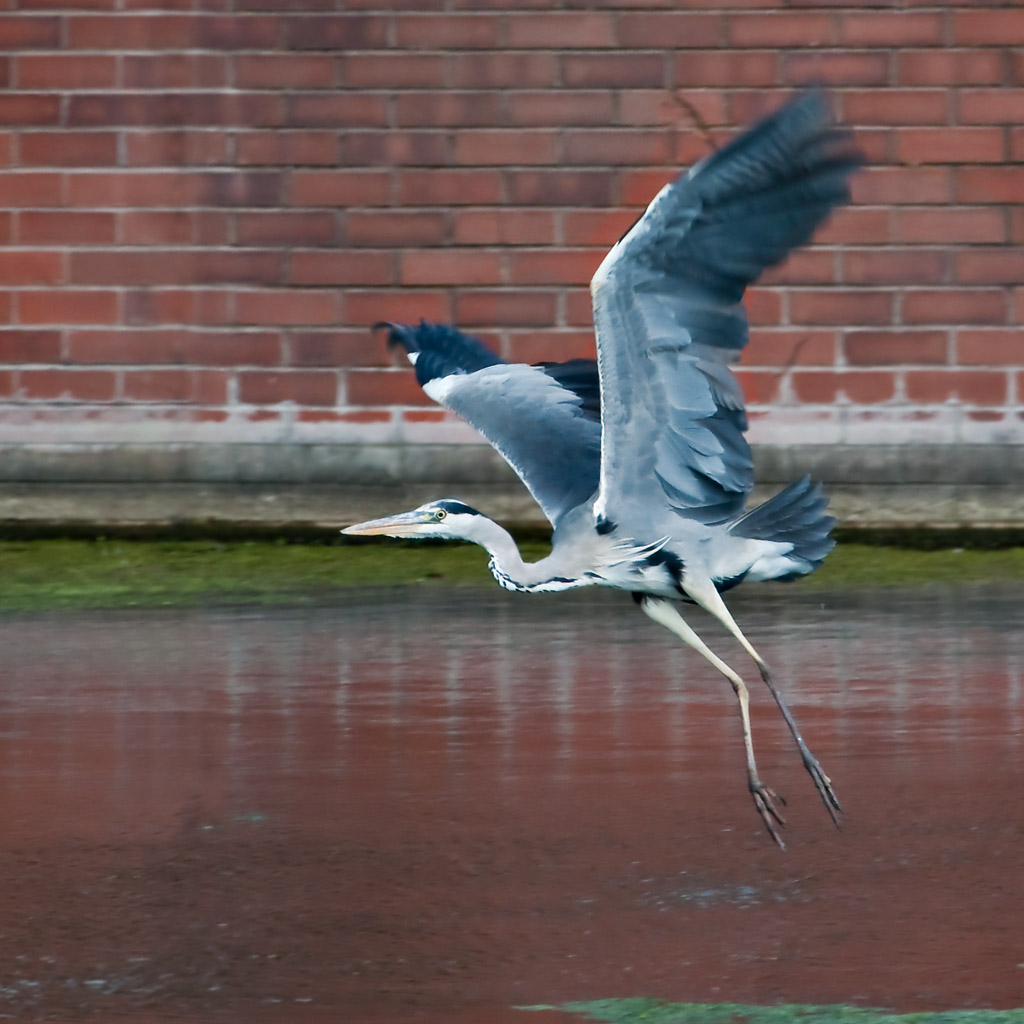
PS: Here's a down-sampled copy of one of your images - 900 pixels wide by 600 high and 1/20th the size of the original. Also - with pBase - if you want to post links to your images you need to display the image - then click on "Edit Image" and then copy the URL from near the top right-hand-side of the screen. If you don't you'll get a situation where you'll be able to see the images, but others won't be able to.
Last edited by Colin Southern; 12th October 2009 at 12:03 AM.
-
12th October 2009, 01:12 AM #7
- Join Date
- Oct 2009
- Posts
- 15
Re: Canon DPP Processing for PBase Upload
Colin:
You're learning this idiot (me) real good. How'se this:
http://www.pbase.com/image/118189622
aldoLast edited by altosax; 12th October 2009 at 01:55 AM.
-
12th October 2009, 02:29 AM #8
- Join Date
- Dec 2008
- Location
- New Zealand
- Posts
- 17,660
- Real Name
- Have a guess :)
Re: Canon DPP Processing for PBase Upload
Hi Aldo,
The resolution of the image at that URL looks good - but the URL isn't quite right - it should look something like
http://www.pbase.com/cjsouthern/imag...621/medium.jpg
... you need to get it by displaying the image - then clicking Edit Image - and then look for it in the top right-hand corner area. It may seem like a small point - but - when you start posting images inline, the images won't display for anyone but you unless you do it this way (it's to do with their security, but I won't go into details).
So almost there!
PS: When posting inline you'll also need to edit the "/medium.jpg" to be "/original.jpg"
-
12th October 2009, 06:27 AM #9Moderator
- Join Date
- May 2008
- Location
- Windsor, Berks, UK
- Posts
- 16,737
- Real Name
- Dave Humphries :)
Re: Canon DPP Processing for PBase Upload
Hi Aldo,
As you have moved on from this and successfully done one, I am guessing you may now know that the answer to this is yes - as long as you have the "constrain proportions" checkbox ticked, it will calculate the height for you.What about height value? Does it default to a number once the width number is entered?
As far as putting images on PBase is concerned, yes you are there
Colin's follow up was to do with being able to direct link such an image into somewhere like this and have it display in the post, like he did with the metro one.
Oh, and don't worry about being an idiot, you're not, it's just unfamiliar to you, that's all.
Just as facebook is a whole new world to me; one I only started last night so I could keep up with my son's exploits at Uni!
Cheers,
-
12th October 2009, 07:52 AM #10
- Join Date
- Dec 2008
- Location
- New Zealand
- Posts
- 17,660
- Real Name
- Have a guess :)
Re: Canon DPP Processing for PBase Upload
Keep in mind that Aldo is using DPP Dave, not PSE. Not sure if "constrain proportions" is the same in DPP. Originally Posted by Dave Humphries
You're doing well Dave - I'm just getting to grips with Twitter! I signed up to Facebook a couple of days ago at the request of a girl I had a big crush on at intermediate school some 35 years ago! (hey, at least she's talking to me now!Just as facebook is a whole new world to me; one I only started last night so I could keep up with my son's exploits at Uni!) - but to be honest, it's all a bit too complicated for me!
-
12th October 2009, 07:08 PM #11
- Join Date
- Jan 2009
- Location
- South Devon, UK
- Posts
- 14,417
Re: Canon DPP Processing for PBase Upload
Well, I've had a look at DPP (which I only really use to display exif info) and this is how I would do the resizing. Apologies if I have got anything wrong or I am stating the obvious but I think it is probably best to go through the whole procedure, at least the way I understand it.
Select image to change. Select File then Convert & Save. Change output resolution (click and drag cursor and enter new size, say 96 ppi).
Click the Resize setting little box. Select Width (drag cursor) and enter new width (800 or 1024 etc), or height, but not both; if you leave Lock Aspect Ratio ticked the other dimension will change automatically.
Check that Save as Type is set for Jpeg (alter if necessary).
Check Quality setting and move slider to left to reduce quality. I wouldn't go below 8.
Save image to suitable folder.
I am not sure what you do about sharpening but I always prefer a little sharpen after a substantial resize. As far as I can see, the only way to do this would be to Open the resized file and select the Tool Icon; the Curves histogram should appear at the right edge. Move the sharpness slider slightly to the right, say 50 to 100 setting then select File and click Save.
To continue sharpening more images go to View and return to the main window.
I always uploaded images to Pbase by adding them individually to the Upload list but after some advice from this site I now manage, usually, to create Zip Files and upload all images in one go.
Hope some of this makes sense and helps.
Geoff.
-
13th October 2009, 12:40 AM #12
- Join Date
- Oct 2009
- Posts
- 15
Re: Canon DPP Processing for PBase Upload
Dave
Thanks for your reply. Veery helpful. I'm experimentig with different re-sizes and post re-size "tweaking"...
Facebook is a great, great source of info to find out what your kids are up to... I use it to keep a check on our daughter in college. she doesn't like the fact that she was forced to accept me as a "friend" (she was arguing that my access to her page would "chill" her freedom of expression!!!!!), but heck, I'm paying her tuition and living expenses so she finally relented...
regards
aldo
-
13th October 2009, 03:14 AM #13
- Join Date
- Oct 2009
- Posts
- 15
Re: Canon DPP Processing for PBase Upload
Geoff:
Take a look at this image:
http://www.pbase.com/annapagnacco/im...9474382/medium
what resizing values do you think she uses?
the ratio is 17/26
regards
aldo
-
13th October 2009, 05:55 AM #14
- Join Date
- Dec 2008
- Location
- New Zealand
- Posts
- 17,660
- Real Name
- Have a guess :)
Re: Canon DPP Processing for PBase Upload
Hi Aldo, Originally Posted by altosax
Pbase creates up to 4 different sizes of any image that you upload (depending on the original size); "small" "medium" "large" and "original". And you can insert any of those sizes here just by changing the last part of the URL to small.jpg, original.jpg etc.
So to answer your question about what size that lady cropped her image to the answer is "who knows" because we're only seeing the "medium.jpg" version of it - so that might be all that there is because it was uploaded as an image that size -or - she might have uploaded a bigger one (like I do) and only choose to link the smaller version. My images are normally around 1000 pixels wide - and if I'm wanting to inflict them on people here in all their "charm" and "glory" then I'll link to the full size version - but if I'm just showing one in someone elses thread just to illustrate something then I quite often only use the medium or large versions.
With regards to aspect ratios, you can create whatever you like - the only rule is "there are no rules" - just remember though that every 100 pixels of image is roughly 1 inch on someones monitor. - so if you want them to see your image postcard size then make it about 600 pixels wide by 400 high.
Does this help?
-
13th October 2009, 06:34 AM #15Moderator
- Join Date
- May 2008
- Location
- Windsor, Berks, UK
- Posts
- 16,737
- Real Name
- Dave Humphries :)
Re: Canon DPP Processing for PBase Upload
Hi Aldo, Originally Posted by altosax
If you click the "original" link, you get an image of 1350 x 898 pixels, so I'd bet that was what was uploaded.
I wouldn't get too hung up on aspect ratios.
The thing to realise is there are two reasons why pictures change size; cropping and size reduction. We know about the latter, but we haven't discussed the former.
Cropping can be carried out to set ratios; 5 x 4, 7 x 5, 5 x 5, 6 x 4, etc. or without restriction, meaning the height and width can both be set as you desire.
Cropping is done to exclude unwanted content from the final picture.
There after, the image may, or may not, have been size reduced, if it was, then it was with "Lock Aspect Ratio" ticked.
I would guess Ann Pagnacco has done this, hence the 17/26.
However, having just divided 1350/898, I get 1.503, meaning it was probably 3/2 (or 6 x 4) as a ratio.
Not sure where you got 17/26 from?
Have I got the wrong end of a stick again?
Regards,
-
13th October 2009, 11:49 AM #16
- Join Date
- Oct 2009
- Posts
- 15
Re: Canon DPP Processing for PBase Upload
Dave:
It should be 26/17 which equates to 152, in line with your calculations. I measured the width and height of the pic.
Regards
Aldo
-
13th October 2009, 07:34 PM #17Moderator
- Join Date
- May 2008
- Location
- Windsor, Berks, UK
- Posts
- 16,737
- Real Name
- Dave Humphries :)
Re: Canon DPP Processing for PBase Upload
I am puzzled. Originally Posted by altosax
Do you mean "measured" as with a ruler off screen?
I agree there's not that much difference though, I had 1.5 -oh- 3 (1.503) and you have 1.529.
I think I'm making a mountain out of a molehill") (it's been known before
(it's been known before  )
)
It's been a hard day at the office, I'll retire perplexed

Maths wasn't my strongest subject
Cheers,
-
18th October 2009, 07:33 PM #18
- Join Date
- Oct 2009
- Posts
- 15
Re: Canon DPP Processing for PBase Upload
GEOFF:
The 1024 width recommendation seems fine for a hrizontally comfigured pic. What about a vertically configured pic? What's a good size for uploading?
Thanks
aldo
-
19th October 2009, 06:15 PM #19
- Join Date
- Jan 2009
- Location
- South Devon, UK
- Posts
- 14,417
Re: Canon DPP Processing for PBase Upload
I normally work on around 700 or 800 pixels width, depending on 2 x 3 or 4 x 5 ratio images, for portrait oriented images.
It is just the same dimension as the depth in a 1024 landscape image, approx.

 Reply With Quote